Step 3: Set up a Self-Service Portal
How about providing customers with the information they need to solve their issues themselves? Of course, not all customer requests can be solved using knowledge base articles, but for general, repetitive requests, you should really integrate Atlassian Confluence with your support portal to add knowledge base functionality.
In addition to this, the knowledge base can be expanded by adding restricted articles, only visible to support agents, for internal processes and documentation. This helps them share knowledge and ultimately, find information faster.
Step 4: Improving the Experience
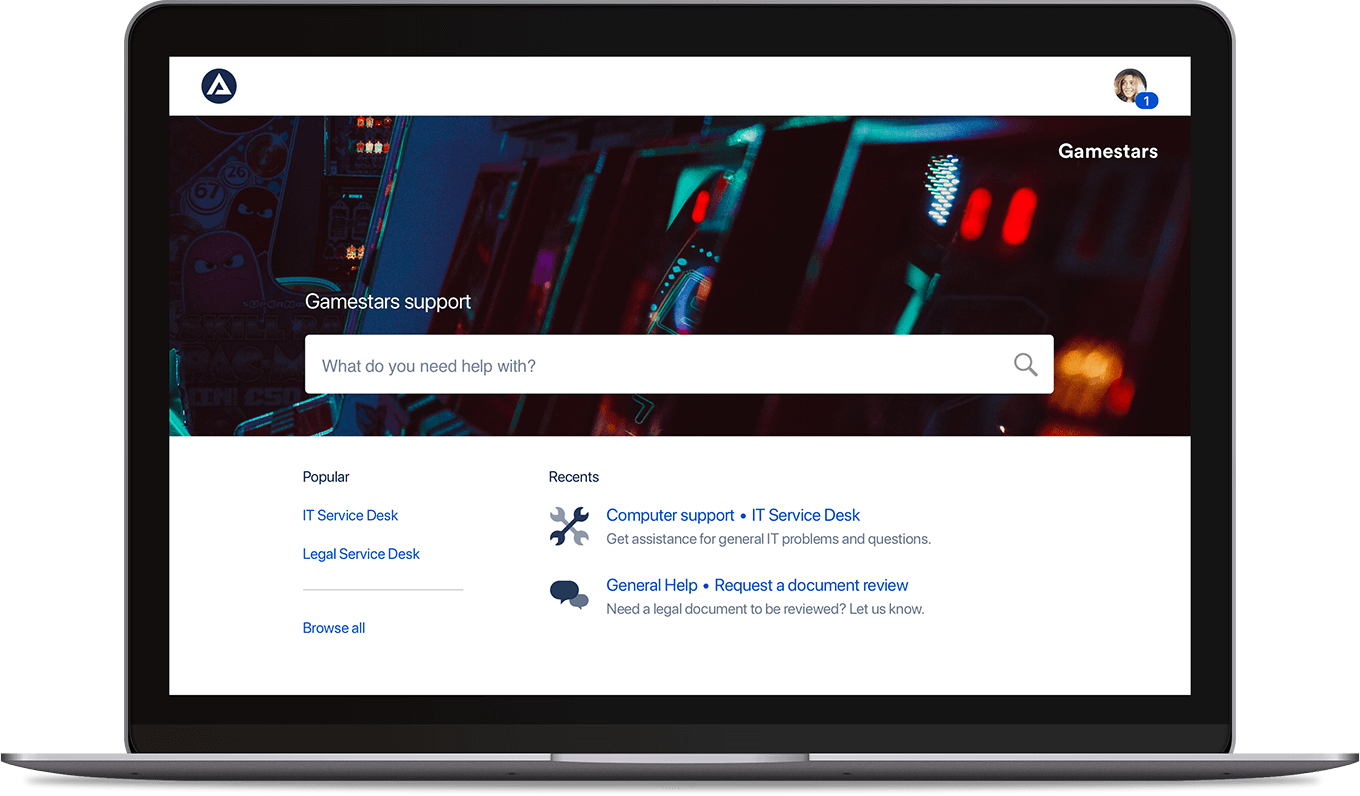
In addition to ticket creation, we want to offer customers a branded experience. Jira Service Management has several native features that allow you to maintain your brand’s look and feel by using your own colour scheme or request type icons. In the Cloud version, you can also customise background images for your search bar.
Jira Service Management Cloud
By using popular apps like Refined for Jira Service Management, you can design your portal to match your brand identity. This particular app also adds additional features, such as:
- Link to multiple Confluence spaces.
- Referring to external links in search results.
- Viewing permissions on certain content items.
- Showing open requests on the home portal.
To illustrate the possibilities an app like this offers, we can use our own portal as an example. At Avisi, we like to keep things a little informal and we like to entertain our customers a bit… so we regularly customise our support portal. We make it snow in winter, show a flying Santa around Christmas or have an Avisi rocket shoot through your screen. It’s simple, but most customers like it.
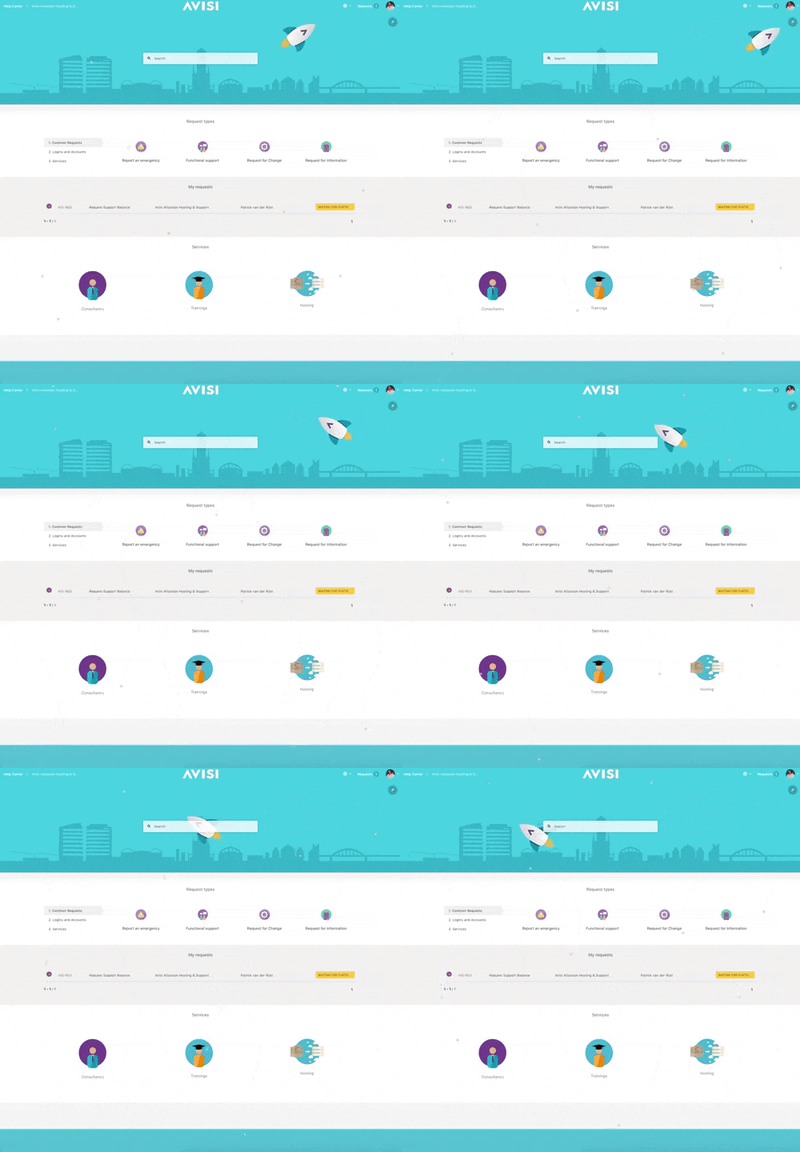
Our portal powered by Refined Theme for Jira Service Management
Step 5: Automate Repetitive Tasks
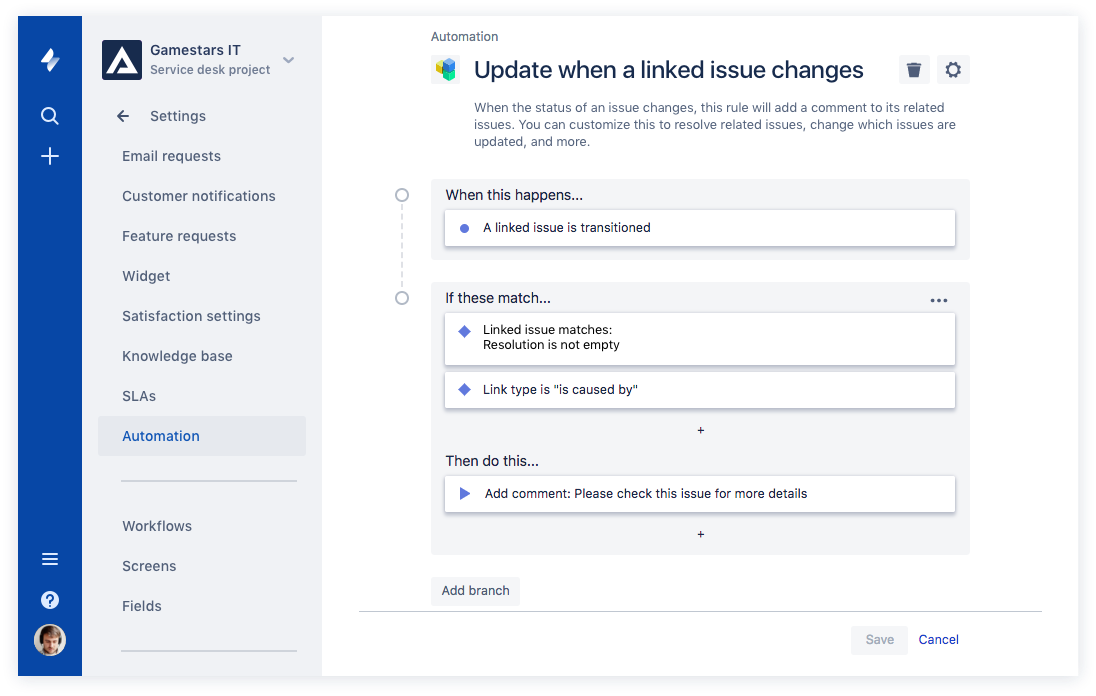
Out of the box, Jira Service Management comes with an automation tool. This tool can help you to prioritise issues, alert specific users or set up automations between support and development project issues. We often receive requests for automated feedback messages to be sent to an agent, or even to the customer, after a development issue is resolved.
Our support portal has been automated to support both our support agents and our customers:
1. Automation for support agentsWhen an issue is created, the system automatically adds information about the customer and their server(s) to the ticket. This provides support agents with information they need, right away.
The system also links the support issue to the customer’s support subscription. If the customer doesn’t have a valid support subscription or if there are no hours remaining on a punchcard for example, the automated bot will comment on the issue.
2. Automation for customersOur customers can request automated reports, for example, for time spent on support (for current or previous month(s)).
Сброс пароля
Если мы забыли пароль администратора, то существует процедура его сброса. Для этого остановис Jira:
systemctl stop jira
Открываем файл:
vi /opt/jira/bin/setenv.sh
* где /opt/jira — каталог, в который мы установили Jira.
Приводим данную строку к виду:
JVM_SUPPORT_RECOMMENDED_ARGS=»-Datlassian.recovery.password=’test1234′»
* где test1234 будет нашим временным паролем для восстановления.
Устанавливаем системные окружения:
export JIRA_HOME=/opt/jira-home
export JAVA_HOME=/usr/lib/jvm/default-java
* где JIRA_HOME и JAVA_HOME в нашем случае соответствуют /opt/jira-home и /usr/lib/jvm/default-java.
Запускаем jira вручную:
/opt/jira/bin/start-jira.sh
Теперь переходим на веб-интерфейс и входим в систему под пользователем recovery_admin с паролем, установленным в файле setenv.sh (в нашем примере, test1234).
Теперь можно зайти в администрирование и изменить пароль для нужного нам пользователя.
После возвращаем систему в штатный режим работы. Для начала остановим сервис:
/opt/jira/bin/stop-jira.sh
Вернем значение для директивы JVM_SUPPORT_RECOMMENDED_ARGS:
vi /opt/jira/bin/setenv.sh
JVM_SUPPORT_RECOMMENDED_ARGS=»»
Запускаем сервис:
systemctl start jira
Reporting Features
1. What are the report types supported by Analytics Plus?
Analytics Plus supports a wide variety of reports, in the form of charts, pivot tables, summary views and tabular views. To learn more about the various types of reports click here. To know more about dashboards and KPI widgets, click here.
3. What are formulas in reports?
Formulas are calculations that can be defined using the powerful formula engine to create required reports. Refer this documentation to know more.
5. Can I modify the tables imported from Jira Service Management Cloud?
The data from Jira Service Management Cloud is synchronized with Analytics Plus automatically, and stored in the form of various tables. Therefore, it is not possible to add data or modify the existing data present in these tables.
6. Can I add new columns to the tables imported from Jira Service Management Cloud?
No. However, you can add Formula Columns and Aggregate Formulas to these tables, to create custom reports. Refer to know more.
7. Can I import new tables into the Jira Service Management Cloud workspace?
Yes. To do this, open the Jira Service Management Cloud Analytics workspace, click Create from the side panel and select the New Table / Import Data option. You can integrate with other applications, or choose to import data stored in local files, web URLs, local databases, cloud databases and cloud drives. Click the corresponding links to know more.
Yes. To do this, import or add a new table to the Jira Service Management Cloud workspace and define a lookup relationship between the added data and the existing data in the workspace. To define a lookup relationship between two tables, it is essential that the tables have at least one column in common between them. Follow the below steps to establish a lookup relationship.
-
Open the corresponding table, right click the column header and select the Change to Lookup Column option.
-
In the popup that appears, select the column from the second table to look up.
-
Click Save & Close.
to learn more about lookup columns.
9. What are Query Tables?
Using query tables, Analytics Plus allows you to import the required data by writing standard SQL queries. This feature also allows you to combine data from different tables, and create reports from the combined data. Refer this documentation to know more.
All these metrics are great, but don’t forget the most important one
The role of the support team is to maintain and increase customer satisfaction. As the main way to do this in Jira Service Management is by using reports, then reports based on your CSAT ratings must be your starting point. Analyzing the nature of requests and who’s submitting them; measuring your time to first response and resolution; and checking whether you’re keeping up with issues coming in, are all well and good. But none of these metrics are more important than knowing whether the customers are actually happy. The strange thing is, the CSAT survey in JSM often gets overlooked.
Support teams ticking all the right boxes might assume their customers are happy, but that doesn’t mean they are. For example, even if you’re resolving issues within the time stipulated in your SLAs, you might not be giving the customer what they want. You want to avoid the watermelon effect, in which good, ‘green’ metrics hide the true, ‘red’ state of your operation.
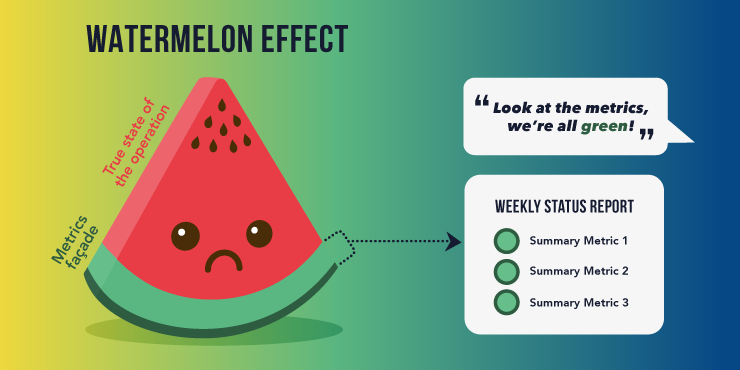
Basically, you want to always pay equally close attention to whether your customers are happy as to whether you’re hitting your other ITSM metrics. And even though the single CSAT report in native JSM is limited, you can use Custom Charts for Jira to build different kinds of CSAT charts, across multiple projects, and filter the data down on assignee and other custom fields. That way you get much better insight into your customer satisfaction scores.
After all, a good service desk isn’t one that meets all its SLAs. It’s one that actually, and satisfactorily, solves the customers’ problems.

Christopher is a self-confessed nerd who’d probably take the cake on Mastermind if Star Trek: Voyager was his specialist subject. He writes fiction about time travel, conspiracies and aliens; loves roller coasters, hiking and Christmas; and hates carpet, rom-coms and anything with chilli in it. He’s written extensively for technology companies and Atlassian partners and specializes in translating complicated technical concepts, specs and jargon into readable, benefits-driven copy that casual readers will understand.
How Jira Service Management simplifies ITSM
The problem with many ITSM service desks is that they’re overengineered, incorporating most if not all of the 26 processes described in the IT Infrastructure Library (ITIL). This makes them too expensive and too complicated to use. Many of those processes just aren’t relevant to most companies.
Jira Service Management (JSM) keeps things simple for support teams by incorporating the four core ITIL processes only: request fulfillment, incident management, problem management, and change management. Because Atlassian knows that these are all most companies need.
Plus, JSM is an agile tool as well as being an ITSM tool. In the past these were two very different disciplines. The fact that JSM does not rigidly adhere to ITIL allows scope for features inspired by agile methodologies, such as agile incident management, cross-team collaborative capabilities, and improved reporting.
Find out more about how Jira Service Management is making ITSM more agile.
Conclusion
Jira Service Management – no matter if we are talking about the Data Center or Cloud hosting – offers pretty decent SLA tracking capabilities. On the very basic level, the functionality remains the same in either hosting type, yet the difference lies in the details.
The Cloud version offers better out-of-the-box automation, and the Data Center version can be extended with powerful solutions such as SLA PowerBox, allowing the admin to properly configure even the most complex Service Level Agreements.
All in all, Jira Service Management remains a trustworthy solution when it comes to tracking Service Level Agreements and can be configured towards it regardless of the hosting type.
Recommended Reads:
- How to Create Jira Filters
- GDPR: The Complete Guide to Compliance Regulations in Jira
- Jira Time Tracker: Easy Time Tracking and Reporting in Jira
- How to Use Jira for Non-Software Projects (The Pro Guide)
- How to Use SAFe in Jira: The Comprehensive Guide
- How to Manage Quotes in Jira
Sync Jira Service Management Comments Across Jira Projects To Improve Visibility
The customer support workflow can be streamlined further by syncing JSM comments with Jira projects — and vice versa. Want to keep internal comments private? No problem. You can distinguish between public and private comments and control the direction of syncing.
But that’s not all — we know that not all comments are created equal. That’s why you can use keywords or key phrases to make only selected comments public. Meanwhile, comments without this keyword are synced as either internal comments or ignored when syncing Jira Service Management with Jira projects. And, of course, all attachments can be synced from Jira Service Management to Jira using the same privacy settings and sync direction as the comments.
Your browser does not support the HTML5 video element
Measuring SLAs in Jira Service Management
While Jira Software and Jira Core have no SLA module whatsoever, Jira Service Management comes with a simple, built-in SLA measurement tool integrated with the issue queue, which allows us to:
- create many different SLA metrics
- measure SLAs with the use of different calendars and issue statuses
- report SLA breaches
- notify that the SLA is about to be breached via email (using automation rules).

The built-in SLA solution is often enough, especially for small companies not serving external customers. If Jira Service Management is used for internal IT or a helpdesk that doesn’t need any hybrid solutions – like passing the task to consultants working in Jira Core or sporting field repairs – the standard SLA module will most probably suffice.
The situation gets more complicated if, for example, we want to show the time to SLA breach to the customers themselves or track the SLA metrics between different tools.
Differences between Cloud and Data Center
The built-in SLA module in Jira Service Management is more or less the same in different hostings. Atlassian paid attention to keep the Cloud product up-to-date, and even offer some additional features compared to the Data Center and Server hostings.
Still, these features are rather a convenience than a “killer feature”, including:
- Automatically closing resolved service requests
- Automatically closing resolved incidents
- Automatically closing resolved requests
While it’s a nice-to-have, it’s nothing that cannot be done with some effort on the Jira admin’s side in the Server and Data Center deployments.
Using Jira Service Management
Looking to put your instance of Jira Service Management to work? Aligning your JSM instance with organizational needs takes time — and is much easier when working with the support of a team of Atlassian experts. Fortunately, understanding the basic processes and concepts that underlie Jira Service Management is within every company’s grasp.
Once you’ve chosen between Atlassian Cloud and Data Center and have your Jira Service Management instance set up and configured, you can kick things off by creating a service project. These projects are generally associated with specific teams at your company and are based on templates suited for these teams. You can choose from a variety of available templates or create them yourself. Project set up also involves managing permissions, choosing or building necessary workflows, and setting up any forms users will need. Finally, you can set up a knowledge base by leveraging JSM’s Confluence integration so both internal and external users have ready access to key information.
Team members that are licensed to work in Jira Service Management — called agents — can then begin to work on requests submitted by customers. Customers do not need to be licensed users to interact with Jira Service Management through the channels you make available, although they do need to be given permission to access specific service projects. As noted above, you can customize the channels customers use to submit requests, but a help center for your JSM instance and portals for each service project are created automatically. As issues are resolved and your work with JSM progresses, you can analyze your team’s performance to uncover important trends and insights.
Setting up Services
In this example, I’ll be creating two Services and connecting them to two existing Bitbucket repositories. If you want to follow along with this blog post, download the two zip files attached webstore.zip and webstore1.zip.
To create a Service, navigate to the project you created and select Services > Add a service. Fill out the information as detailed below.
|
Field |
Value |
|---|---|
|
Name |
Webstore |
|
Tier |
Tier 1 |
|
Incident responders |
|
|
Change approvers |
|
|
Repository |
Create your second Service
|
Field |
Value |
|---|---|
|
Name |
Webstore1 |
|
Tier |
Tier 3 |
|
Incident responders |
Webstore Team |
|
Change approvers |
|
|
Repository |
Now that we have our Services created and connected to our Bitbucket repositories, we can proceed to the next step.
Управление организационными изменениями
Управление организационными изменениями предполагает проведение изменений не связанных с изменением поведения и сознания людей. К таким видам изменений
могут относиться изменения в процессах, системах, организационной структуре, должностных ролях и т.п. Таким образом, управление организационными изменениями
концентрируется на технической стороне проводимых в организации изменений.
Управление организационными изменениями более формализовано и структурировано, чем управление изменениями на личностном уровне. Этот вид управления
изменениями выстраивается в соответствии с подходами и методами управления проектами. Тем не менее, оба этих вида изменений всегда осуществляются
совместно, т.к. невозможно проводить организационные изменения без изменения в поведении сотрудников. И наоборот, изменения в поведении сотрудников всегда
будут приводить к организационным изменениям.
В ходе построения системы качества управление организационными изменениями может затрагивать несколько уровней деятельности компании. Эти уровни определяются
количеством вовлекаемых в изменения организационных единиц.
К таким уровням относятся:
- уровень отдельных сотрудников;
- уровень отдельных подразделений;
- уровень групп подразделений (сотрудников);
- уровень организации.

На уровне отдельных сотрудников осуществляется управление изменениями в порядке действий на рабочем месте. Эти изменения затрагивают выполняемые
функции, задачи, ответственность и подчиненность сотрудников. Как правило, документально изменения отражаются в рабочих и должностных инструкциях.
На уровне отдельных подразделений изменения затрагивают обособленную деятельность подразделений. В этом случае процесс начинается и завершается внутри
одного подразделения и необходим для обеспечения работы этого подразделения. Управление изменениями на этом уровне связано с распределением работ между
сотрудниками подразделения и изменением взаимодействия между ними. Документально изменения на уровне отдельных подразделений отражаются в положениях о
подразделениях и локальных процедурах.
На уровне групп подразделений (сотрудников) управление изменениями связано с взаимодействием между различными подразделениями и сотрудниками в рамках
одного процесса. Этот процесс является общим для нескольких подразделений и его изменение может затрагивать все сферы деятельности (организационную
структур, порядок работы, подчиненность, функции и задачи сотрудников, системы управления). Документально изменения этого уровня представляют в картах
процессов и процедурах.
На уровне организации управление изменениями охватывает все процессы и все подразделения. В этом случае изменения могут затрагивать принципы управления
и порядок работы организации. Такие изменения представляют в целях, бизнес планах и концепции развития организации.
Advanced Jira Service Management SLA Use Cases
Here are the 3 most common advanced SLA Use Cases that need something extra, above the built-in SLA module found in Jira Service Management.
Use Case 1: A Logistics Company and their Field Operations
A logistics company primarily serves logistics centers with expert knowledge regarding specialized equipment. Several dozens of engineers spend their workday servicing advanced machines distributed across warehouses located in different European countries.
Their primary advantage over the competition is the ability to conduct fast, specialized repairs and maintenance work as field operations, often without a stable internet connection. The company needed a solution that would serve as a bridge between the analog and digital world.
Every day the engineers print their issue cards from Jira and then start their journeys across different locations, filling the Jira cards with hours and signatures. By the end of the day, the team inputs the data into Jira.
With SLA PowerBox’s “negotiated days” feature, such work can be precisely reported in accordance to the real-time it took, and every satisfied customer ends up with a solid, monthly report with service listing and time spent on each task.
Use Case 2: On-call Notifications
A company supports critical systems for its customers. They provide 24/7 support for selected services while other services are supported only in an 8/5 system.
As critical failures after working hours occur relatively rarely (10-15 events each year), there is no need to keep a support team working around the clock. They’re using an on-call engineer who is notified only in case of an emergency.
Using Jira and SLA PowerBox, they are able to collect incidents continuously and notify on-call engineers (and their managers in specific cases) via SMS/Text messages and on Slack channels. Notifications are sent in specific cases only (after regular office hours and for critical services).
Use Case 3: – Software Team
A Software company uses Jira to manage its software delivery with Scrum. Next to regular planned development, they provide critical bug fixing for live systems.
As patch delivery is essential to customers, the company decided to manage it based on Service Level Agreements. Software projects in Jira don’t provide built-in SLAs. But with SLA PowerBox, they’re able to track bug-fixing time (including showing SLAs on Agile cards) as agreed with their customers.
Шаг 2: Создание проекта и настройка
После успешной установки Jira Service Desk на свой сервер, вы можете начать настраивать свой проект. В этом шаге мы рассмотрим, как создать проект и осуществить необходимые настройки.
-
Откройте панель администратора Jira Service Desk.
-
Выберите «Projects» в навигационной панели.
-
Нажмите на кнопку «Create Project».
-
Выберите тип проекта, который наиболее подходит для вашей компании. Jira Service Desk предлагает несколько типов проектов для различных отделов или служб вашей организации. Вы можете выбрать тип проекта «IT Service Desk», например, если вы решили использовать Jira Service Desk для организации IT-службы.
-
Введите имя проекта и его ключ. Ключ будет использоваться для идентификации проекта в Jira Service Desk.
-
Настройте видимость и доступность проекта. Вы можете выбрать, кто будет иметь доступ к проекту и какой уровень доступа у каждого пользователя.
-
Нажмите на кнопку «Create» для создания проекта.
Поздравляю! Вы успешно создали проект в Jira Service Desk. Теперь вы можете перейти к настройке своего проекта, чтобы он отвечал требованиям вашей компании. Вам может понадобиться настроить схемы запросов, рабочие потоки, правила обработки и другие параметры, которые помогут вам эффективно управлять запросами и задачами в рамках вашего проекта.
How to improve your SLA tracking
With out-of-the-box Jira Service Management, the only way to get SLA reports on a Jira dashboard is with the Service Project Report gadget. However, this gadget doesn’t let you make SLA reports on the dashboard. You have to go into the project and generate them as project reports first, then the gadget pulls these already made reports onto your dashboard. It means, if you have multiple service projects, you have to generate each one on a per-project basis, and if you want to change the configuration, you have to go back into the project. You can’t do it on the dashboard. In effect, you lose the speed and efficiency that comes with dashboard reporting.
This article has more on the difference between project reporting and dashboard reporting, and why dashboard reporting is better.
With Custom Charts for Jira, you can build reports and charts out of your SLA data right there on the dashboard, whilst getting a lot more choice and control over how those charts appear. You can also calculate the averages of your SLA figures and filter them by assignee, request type, and other custom fields without writing a single line of Jira Query Language – which you can’t do natively.
4 SLA reports that you can create in Custom Charts for Jira are:
- Average Time to First Response by Request Type
- Time Remaining on a SLA by Assignee
- Average Time to Resolution by Assignee
- SLA Breached vs Not Breached
Find out more about how to build these SLA reports in Custom Charts in our recent article.
Подготовка к установке и настройке
Прежде чем приступить к установке и настройке Jira Service Desk, необходимо выполнить ряд предварительных действий.
1. Проверьте системные требования
Убедитесь, что ваше устройство соответствует системным требованиям для установки и работы Jira Service Desk. Такие требования могут включать минимальные или рекомендуемые версии операционной системы, требования к процессору, памяти и жесткому диску, а также необходимые зависимости и пакеты.
2. Загрузите установочный пакет
3. Подготовьте базу данных
Прежде чем установить Jira Service Desk, у вас должна быть доступна рабочая база данных. Вы можете использовать одну из поддерживаемых баз данных, таких как MySQL, PostgreSQL или Oracle. Убедитесь, что база данных настроена и готова к установке Jira Service Desk.
4. Создайте административную учетную запись
Для установки и настройки Jira Service Desk вам потребуется административная учетная запись. Создайте учетную запись с необходимыми привилегиями и запомните учетные данные.
5. Создайте план обслуживания
Прежде чем приступить к установке и настройке Jira Service Desk, определитесь с требованиями и ожиданиями ваших клиентов. Создайте план обслуживания, который отразит ваши сервисные уровни, правила приоритетности и процессы обработки запросов.
После выполнения всех этих предварительных действий вы будете готовы к установке и настройке Jira Service Desk.
Импорт данных и настройка пользователей
Перед началом работы с Jira Service Desk, необходимо импортировать существующие данные и настроить пользователей системы. Это важный этап, который поможет упростить процесс работы и даст возможность максимально эффективно использовать сервис.
Для импорта данных в Jira Service Desk можно воспользоваться функцией «Импорт данных», которая доступна в административном разделе системы. С помощью этой функции можно загрузить файлы в форматах CSV или XML, содержащие информацию о проектах, задачах, приоритетах и других данных.
После успешного импорта данных необходимо настроить пользователей системы. Для этого в Jira Service Desk предусмотрена возможность создания учетных записей и назначения соответствующих ролей и разрешений.
Во время настройки пользователей необходимо определить, какие роли будут доступны и какие разрешения имеют различные пользователи. Система Jira Service Desk предлагает гибкую настройку по ролям и разрешениям, что позволяет организовать работу с сервисом с учетом особенностей вашей компании.
Импорт данных и настройка пользователей – это первоначальные шаги, которые следует выполнять перед началом работы с Jira Service Desk. Правильная настройка и импорт данных поможет организовать эффективный процесс работы и использовать все возможности, которые предлагает данная система.
Implement Improvements
While testing automation functionality in preparation for this blog post, I discovered a couple of issues with the pre-built automation rules and the change management workflow which result in undesired behavior. Below I outline the problems I ran into and the recommended solutions.
Solution: Update the automation rule to stop any attempt to move into the Failed status if the change request is currently in the Declined status.
Step-by-step Instructions
-
Edit the automation rule When a deployment is completed, failed or canceled → then transition request accordingly
-
Edit the Else-if block `deployment`.`state` equals failed
-
Add an additional Issue Fields condition — Status does not equal Declined
-
The final result should look like this:
-
Be sure to publish your changes
Problem: When you move a ticket from Awaiting Implementation → Implementing the deployment is automatically restarted. This will cause the automation rule When a deployment is completed, failed or canceled → then transition request accordingly to run again. Because the status of the deployment is “In Progress” it’ll match the final condition of the rule and try to transition to change request to Implementing. Because the ticket is already in the Implementing status, the rule will fail.
Solution: Update the automation rule to prevent a transition to Implementing from being executed if the change request is already in the Implementing status.
Click here to expand…
-
Edit the automation rule When a deployment is completed, failed or canceled → then transition request accordingly
-
Edit the Else-if block `deployment`.`state` equals in_progress.
-
Add an Issue Fields condition — Status does not equal Implementing
-
The final result should look like this:
-
Publish your changes.
Problem: When a change request is declined, the issue moves into the status Declined, but it continues to show under the queue Open Changes. This is because no Resolution was set when the issue was automatically transitioned.
Step-by-step Instructions
- Click on Project settings > Workflows. Find the workflow tied to the Change issue type and click on Edit.
-
Find the transition leading from Authorize->Declined. Click on that transition and click Post Functions on the box which pops up.
-
Click Add post function > Update Issue Field. Set the field to Resolution, the value to Declined, and then click Add.
- Click Publish Draft and you are good to go! Now change requests which are declined will be moved out of your Open Change queue.
Ask yourself these questions to get started
As a way of actioning these tips, put yourself in your users’ shoes and ask these questions to optimize Jira Service Management for all users:
- What page am I on? Set the context so the answer is a no-brainer.
- Am I finding the answers I came for? Understand what users are looking for.
- Am I wasting my time on this page? Use a clean interface and display for a seamless, pleasant experience on-site.
- Is this answer helpful to me? Make the answer relevant to the user.
Learn more:
- Explore Refined for Jira Service Management Cloud on the Atlassian Marketplace.
- Explore Refined for Jira Service Management Server/Data Center on the Atlassian Marketplace.
Configure Deployment Management in Jira
To proceed to the next step, we’ll want to configure the Deployment Tracking and Deployment Deployment Gating in your Jira Service Management project (requires a premium subscription).
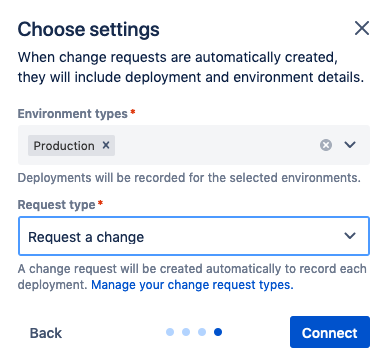
Click on Project Settings > Change Management > Connect pipeline > Use an existing service. Select the Webstore Sevice and fill out the Environment types and Request type fields, then press Connect.
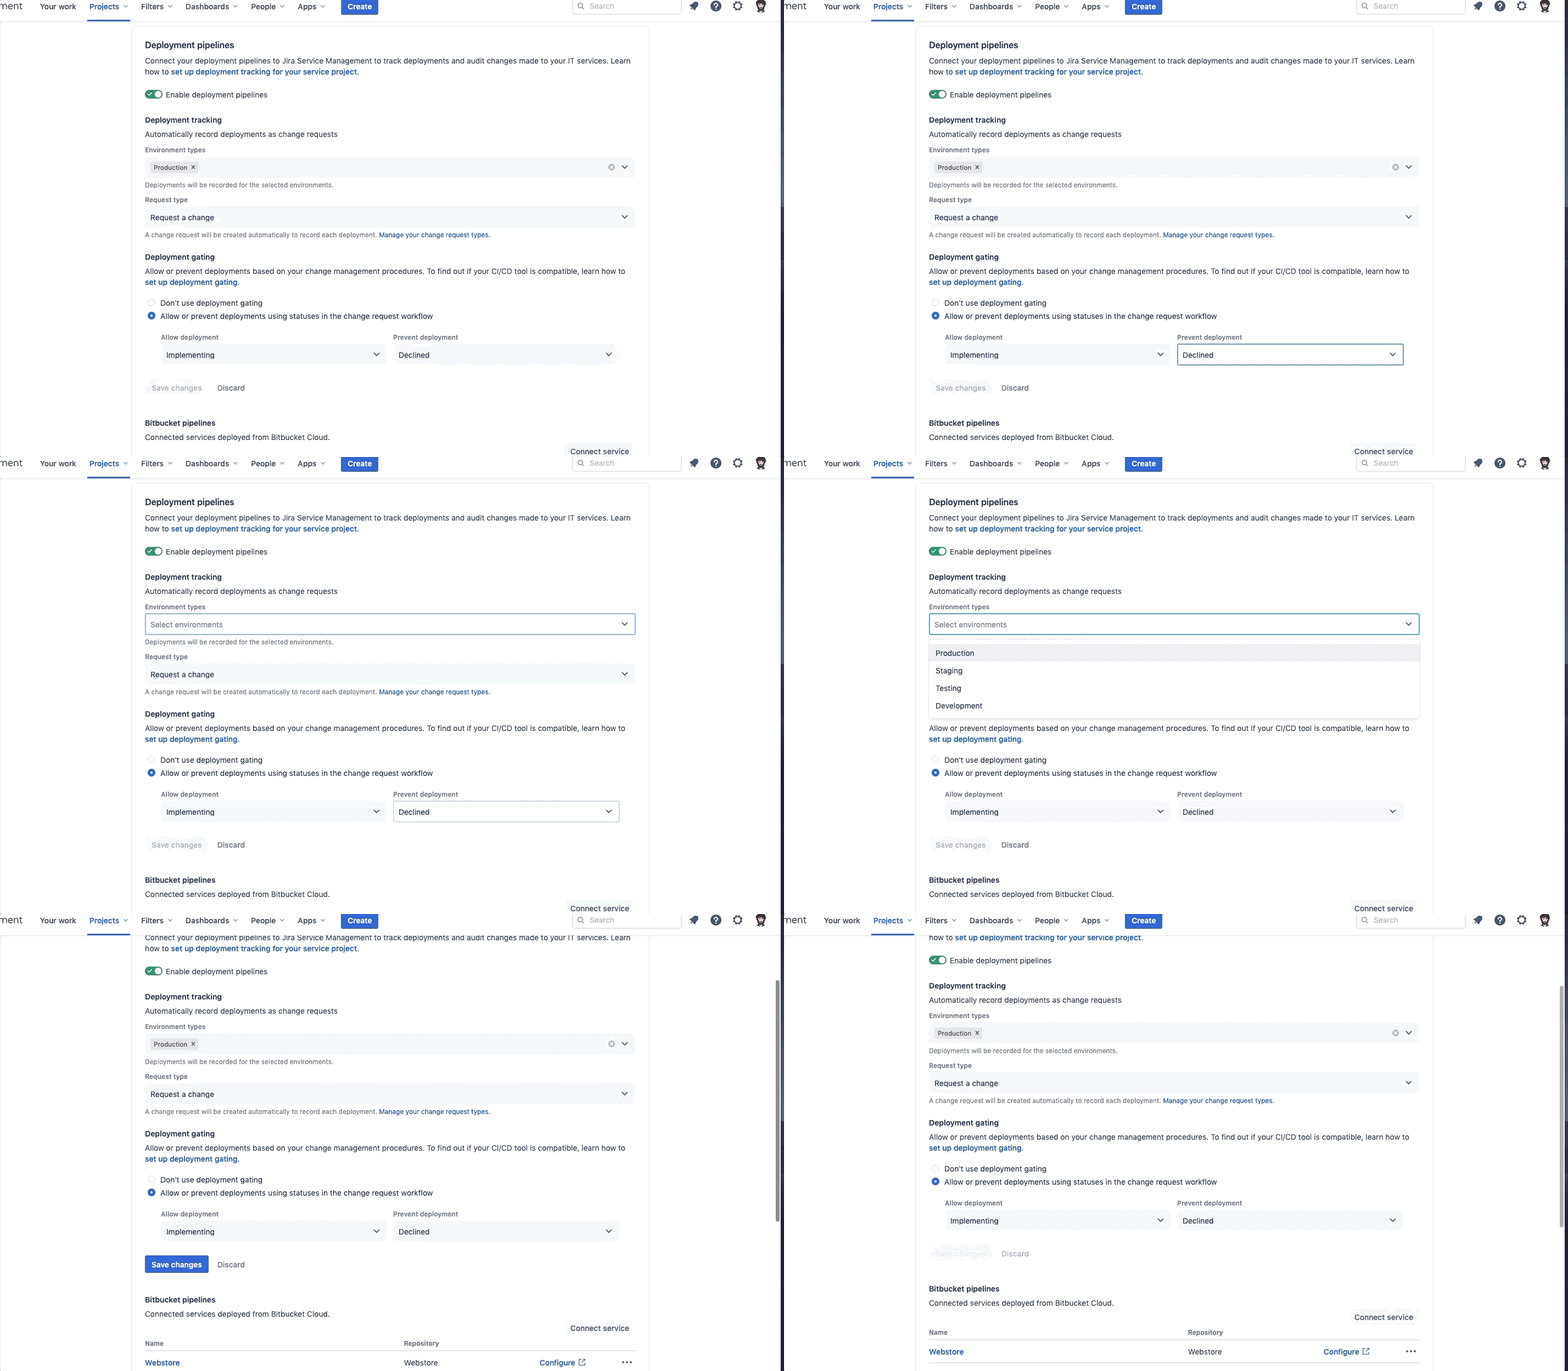
Underneath Deployment gating, select the radio button to allow/prevent deployment depending on the status.

By turning on deployment gating, we are telling the system at what point in the workflow we should allow a deployment, and at what point in the workflow we prevent a deployment from occurring. Set the values as follows:
-
Allow deployment → Implementing
-
Prevent deployment → Declined
This will stop all deployments to production until the linked change request goes into the Implementing status and fail any deployment where the linked change request goes into the Declined status.
When I began testing the deployment gating functionality, I couldn’t figure out how to enable the Save changes button. To fix this, I had to go back up to the Environment types field and remove Production and then add Production back in. This should enable the Save changes button. Click Save changes.
Once the Deployment Tracking and Deployment gating has been set up, connect your two Services, Webstore and Webstore1.

Step-by-step Instructions
To connect a Service, perform the following:
-
Click on the Connect service button underneath the Bitbucket pipelines header.
-
Select Use an existing service and press Next.
-
Choose the service you want to connect and press Connect
When finished, your Bitbucket pipelines section should look like this:

What is Jira Service Management?
Jira Service Management (JSM) is a service management platform, produced by Atlassian, that connects and empowers teams across an organization. JSM compares favorably to competing solutions. It lets external parties submit requests through a variety of methods and enables team members to effectively work together and track those requests. JSM also supports change, configuration, and incident management, the latter enhanced through a supported integration with Atlassian’s Opsgenie.
While Jira Service Management is a great choice for IT teams in any industry — supporting a true DevOps approach to delivering great service — it offers significant value for any team that acts as a service provider for others. By employing Atlassian’s concept of enterprise service management (ESM), teams in HR, marketing, legal, and more can use Jira Service Management to make more of an impact for their employers. With the help of a technology partner that knows Jira inside and out, you can easily configure JSM to produce a solution tailored to your company’s unique business needs.
What about Jira Service Desk?
Jira Service Management launched as the next stage of Jira Service Desk in late 2020. The capabilities of Jira Service Desk remain a key part of JSM, with the ability to respond to and track requests linked to relevant issues in your Jira project management system. But Jira Service Management goes beyond the core service desk offering to provide all the features an organization needs to get started with ESM.
Установка и настройка Jira Service Desk
Процесс установки Jira Service Desk довольно прост и может быть выполнен в несколько шагов:
- Загрузите установочный файл Jira Service Desk с официального сайта Atlassian.
- Запустите установку и следуйте инструкциям по установке.
- Настройте базу данных для Jira Service Desk. Вы можете использовать различные базы данных, такие как PostgreSQL, MySQL, Oracle или Microsoft SQL Server.
- После завершения установки откройте Jira Service Desk в веб-браузере.
- Пройдите процесс настройки и создайте новый проект в Jira Service Desk.
После настройки Jira Service Desk вы можете начать добавлять пользователей, настраивать права доступа и создавать инциденты и задачи. Также вы можете настроить различные интеграции и настроить уведомления для своего проекта.


