

Интеграция с плагином для аналитики
При настройке плагина chatty возможна интеграция с плагином для аналитики, чтобы получать дополнительную информацию о поведении пользователей на сайте. Это позволяет улучшить процесс общения с посетителями и адаптировать его под их потребности.
Для успешной интеграции с плагином для аналитики необходимо соблюдать следующие шаги:
- Установка плагина: Сначала необходимо установить выбранный плагин для аналитики на свой сайт. Рекомендуется выбирать плагин от проверенных и надежных разработчиков, чтобы гарантировать безопасность данных и стабильную работу системы.
- Получение API-ключа: После установки плагина, необходимо получить API-ключ, который будет использоваться для связи с плагином. Ключ можно получить в личном кабинете плагина или у его разработчика.
- Настройка плагина chatty: Далее, необходимо перейти в настройки плагина chatty и найти раздел, отвечающий за интеграцию с плагином для аналитики. В этом разделе необходимо указать полученный API-ключ.
- Проверка и тестирование: После указания API-ключа необходимо провести проверку связи с плагином для аналитики. Для этого рекомендуется провести тестовые диалоги с посетителями и убедиться, что информация о их поведении отправляется на аналитическую платформу.
- Анализ и оптимизация: После успешной интеграции с плагином для аналитики можно приступить к анализу полученных данных и оптимизации процесса общения с посетителями. На основе собранных информации можно принимать решения о внесении изменений в функционал или контент сайта, а также оптимизировать работу операторов чата.
Процесс интеграции с плагином для аналитики является важным шагом в настройке плагина chatty. Он позволяет получить более полное представление о поведении посетителей на сайте и адаптировать работу чата под их потребности.
Join channels (and leave channels)
In the -dialog enter the name of the channel you want
to join in the input box. The name of the channel
is the same as the name of the stream. You can enter more than one channel
name to join by seperating them with a comma. To connect simply press Enter
or click on . After connecting, it will automatically join
the channels you specified.
Even after connecting you can join additional channels via
or entering the command in the inputbox
(e.g. ).
You can leave channels by right-clicking anywhere in the channel and
selecting from the context menu or right-clicking
on the channel’s tab (only available if there is more than one channel) and
selecting from the context menu.
SPRIBE’s Innovative iGaming Products
Shifting our focus to another key player in the online gaming industry, we turn to SPRIBE and their innovative iGaming products.
Known for their high-quality games, SPRIBE is changing the face of online gaming with their unique and engaging offerings.
As we review their portfolio, we will see how SPRIBE’s products enhance the gaming experience on LinuxG Casino.
SPRIBE’s Game Offerings Overview
When we appraise the iGaming landscape in India, SPRIBE emerges as a trailblazer with its distinctive game offerings.
The company sets itself apart with innovative mechanics, stunning graphics, and an unwavering commitment to creating immersive gaming experiences that resonate with players.
In the following discussion, we will explore these unique elements that position SPRIBE at the forefront of the online casino industry.
Unique Gaming Experiences by SPRIBE
Boasting a diverse array of more than 100 innovative games, SPRIBE offers unique and immersive gaming experiences to players on LinuxG Casino.
- Highly interactive user interfaces that ensure engaging gameplay.
- Innovative game design that pushes the limits of iGaming.
- Cutting-edge technology that guarantees smooth and seamless gaming.
- A wide variety of game themes catering to diverse player preferences.
Prerequisites
You need PyQt and Qt Designer installed, and of course python.
I’ll be using PyQt4 with python 2.7.10 but there are no major differences between PyQt and PySide or python 3 versions of those, so if you already have PyQt5 or PySide installed there is no need to downgrade/switch.
If you don’t have anything installed you can get PyQt for Windows here:
It comes with Qt Designer bundled.
For OS X you can download the PyQt via homebrew:
And QtCreator (which contains Qt Designer) here: http://download.qt.io/archive/qt/4.8/4.8.6/
If you’re looking for a more straightforward installation of the qt Qt Designer alone then check out this privately maintained builds page https://build-system.fman.io/qt-designer-download
On Linux the packages required are probably in your distro repositories, if you’re on Ubuntu/Debian you can run:
After you’re done installing requirements on your operating system open terminal/command prompt and make sure you can run command it should show:
If you get «command not found» or something along those lines try googling on how to solve it for your operating system and pyqt version.
If you’re on windows you most likely don’t have (replace with your python version) in your .
To see how to solve that look at this SO thread
In Unity
Unity is the default desktop environment used as of 11.04. Where systems are not ready for Unity they revert to GNOME which is also used in previous releases such as Ubuntu 10.04 LTS (Lucid), see next sub-section.
The easiest way to open the terminal is to use the ‘search’ function on the dash. Or you can click on the ‘More Apps’ button, click on the ‘See more results’ by the installed section, and find it in that list of applications. A third way, available after you click on the ‘More Apps’ button, is to go to the search bar, and see that the far right end of it says ‘All Applications’. You then click on that, and you’ll see the full list. Then you can go to Accessories -> Terminal after that. So, the methods in Unity are:
Dash -> Search for Terminal
Dash -> More Apps -> ‘See More Results’ -> Terminal
Dash -> More Apps -> Accessories -> Terminal
Keyboard Shortcut: Ctrl + Alt + T
Spotlight on Popular Games
In our quest to enhance your online gaming experience, we now turn our attention to the most coveted games on LinuxG Casino.
A thorough analysis of these games will shed light on their unique features that make them a top choice for players. Understanding these elements not only enhances gameplay but also optimizes the winning potential for each player.
Highlighted Games and Their Features
In our exploration of LinuxG Casino, we’ll examine key features of standout games such as Aviator by SPRIBE, Baccarat Live, and the Crazy 777 Slots.
Each game presents unique gameplay mechanics, visually pleasing graphics, rewarding systems, and distinctive traits that set them apart in the online casino industry.
This analysis will provide a comprehensive understanding of these games, setting the stage for potential players in India.
Aviator by SPRIBE
Among the plethora of games available on LinuxG Casino, Aviator by SPRIBE distinctly stands out due to its unique gameplay and objectives. This game has become popular on numerous casino sites and offers:
- An exciting casino bonus
- A refreshing alternative to roulette casino games
- A reputation as one of the best casino games
- A unique gameplay different from traditional casino roulette
Aviator game tricks are available everywhere, and we also have covered it into a comprehensive guide.
Next, we delve into the rising popularity of baccarat live.
Baccarat Live Popularity
The allure of Baccarat Live, another highlight in LinuxG Casino’s captivating game roster, is largely attributed to its straightforward rules, interactive gameplay mechanics, and its inherent appeal to both novice and seasoned players.
Its popularity is further fueled by the no deposit bonus casino feature, making it an irresistible part of the no deposit casino bonus package.
Next, we delve into the thrilling world of the crazy 777 slots game.
Crazy 777 Slots Game Details
Embodying the spirit of traditional casino gaming, Crazy 777 Slots presents a fusion of classic aesthetics and modern features that captivate a broad spectrum of players on LinuxG Casino.
- Theme: Vintage Casino with a modern twist
- Features: High-definition graphics & immersive music
- Bonuses: Multipliers, free spins & jackpot rounds
- Popularity: High engagement rates on LinuxG Casino
Its popularity is testament to its quality, offering players an exciting, reliable, and rewarding gaming experience.
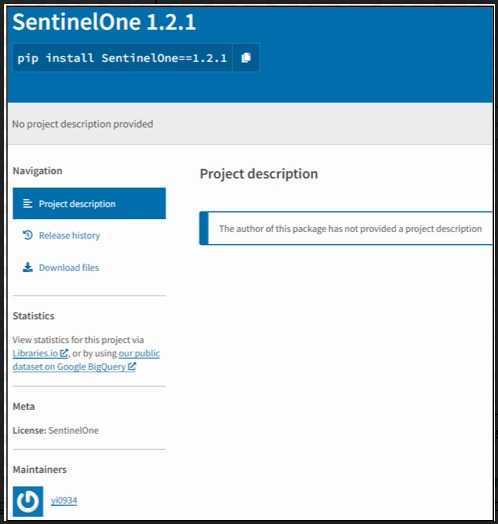
Project details
Statistics
GitHub statistics:
-
Stars:
-
Forks:
-
Open issues:
-
Open PRs:
View statistics for this project via Libraries.io, or by using our public dataset on Google BigQuery
License: MIT License (MIT)
Author: Aaron Hosford
Classifiers
-
Development Status
3 — Alpha
-
Intended Audience
-
Developers
-
Telecommunications Industry
-
-
License
OSI Approved :: MIT License
-
Natural Language
English
-
Operating System
OS Independent
-
Programming Language
Python :: 3
-
Topic
-
Communications :: Chat
-
Communications :: Email
-
Internet :: XMPP
-
Multimedia
-
Scientific/Engineering :: Artificial Intelligence
-
Scientific/Engineering :: Human Machine Interfaces
-
Software Development :: Libraries :: Application Frameworks
-
Software Development :: User Interfaces
-
Text Processing :: Linguistic
-
Основные настройки плагина chatty
После установки плагина chatty на ваш сервер, вам понадобится настроить его для достижения желаемого вида и функционала чата. Здесь представлены некоторые основные настройки, которые могут быть полезными.


1. Настройка префиксов и суффиксов:
С помощью плагина chatty вы можете добавить префиксы и суффиксы к никам игроков в чате. Для этого отредактируйте соответствующие строки в конфигурационном файле плагина. Например, чтобы добавить префикс «» к игрокам с определенным статусом, используйте следующую строку:
prefix: «&a «
2. Форматирование сообщений:
С помощью chatty вы можете изменить форматирование текста в чате, чтобы сделать его более читаемым или красочным. Вы можете настроить цвет текста, добавить жирность, наклонный шрифт и многое другое. Для этого измените соответствующие строки в конфигурационном файле плагина.
3. Фильтрация и блокировка сообщений:
Chatty позволяет настроить фильтрацию чата и блокировку определенных слов или фраз. Вы можете запретить использование неприемлемых или оскорбительных выражений на сервере. Для этого настройте соответствующие параметры в конфигурационном файле плагина.
4. Продвинутые настройки:
Chatty также предоставляет возможность настройки ряда продвинутых параметров для более глубокой кастомизации чата. Вы можете настроить время показа сообщений, отключить определенные функции чата и многое другое. Для этого ознакомьтесь с документацией и настройте соответствующие параметры в конфигурационном файле.
Следуя этим основным настройкам chatty, вы сможете настроить плагин в соответствии с потребностями вашего сервера и обеспечить удобство и понятность в чате игры для ваших игроков.
OpenPGP Public Keys
Source and binary executables are signed by the release manager or binary builder using their
OpenPGP key. Release files for currently supported releases are signed by the following:
- Thomas Wouters (3.12.x and 3.13.x source files and tags) (key id: A821E680E5FA6305)
- Pablo Galindo Salgado (3.10.x and 3.11.x source files and tags) (key id: 64E628F8D684696D)
- Steve Dower (Windows binaries) (key id: FC62 4643 4870 34E5)
- Łukasz Langa (3.8.x and 3.9.x source files and tags) (key id: B269 95E3 1025 0568)
- Ned Deily (macOS binaries, 3.7.x / 3.6.x source files and tags) (key ids: 2D34 7EA6 AA65 421D and FB99 2128 6F5E 1540
- Larry Hastings (3.5.x source files and tags) (key id: 3A5C A953 F73C 700D)
- Benjamin Peterson (2.7.z source files and tags) (key id: 04C3 67C2 18AD D4FF and A4135B38)
Release files for older releases which have now reached end-of-life may have been signed by one of the following:
- Anthony Baxter (key id: 0EDD C5F2 6A45 C816)
- Georg Brandl (key id: 0A5B 1018 3658 0288)
- Martin v. Löwis (key id: 6AF0 53F0 7D9D C8D2)
- Ronald Oussoren (key id: C9BE 28DE E6DF 025C)
- Barry Warsaw (key ids: 126E B563 A74B 06BF, D986 6941 EA5B BD71, and ED9D77D5)
You can import a person’s public keys from a public keyserver network server
you trust by running a command like:
or, in many cases, public keys can also be found
at keybase.io.
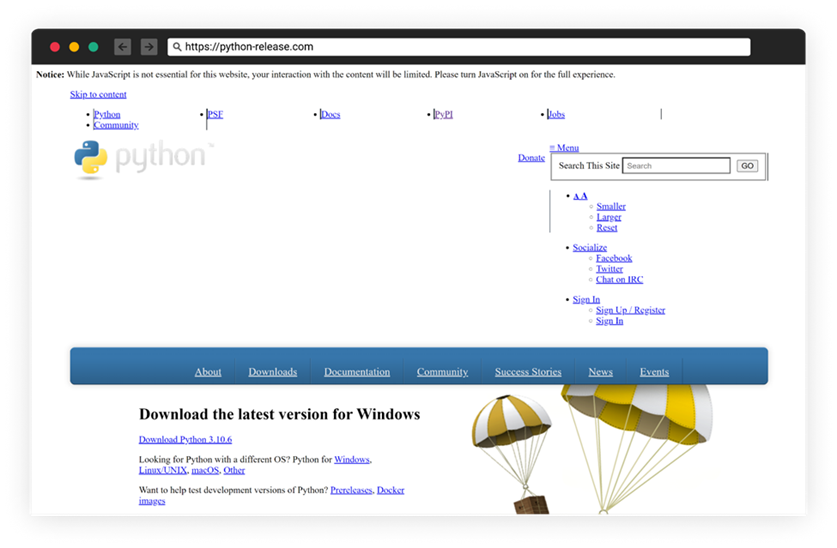
On the version-specific download pages, you should see a link to both the
downloadable file and a detached signature file. To verify the authenticity
of the download, grab both files and then run this command:
Note that you must use the name of the signature file, and you should use the
one that’s appropriate to the download you’re verifying.
(These instructions are geared to
GnuPG and Unix command-line users.)
Настройка голосовых команд в плагине chatty
Плагин chatty для сервера Minecraft позволяет добавить голосовые команды, которые можно использовать в игре. Настройка голосовых команд в chatty достаточно проста и требует нескольких шагов.
1. Установите плагин chatty на свой сервер Minecraft.
2. Запустите сервер и дождитесь его полной загрузки.
3. Откройте файл конфигурации плагина chatty с помощью любого текстового редактора.
4. В файле конфигурации найдите раздел, отвечающий за голосовые команды. Обычно это раздел, помеченный как «voice-commands» или «commands».
5. В этом разделе вы найдете шаблоны голосовых команд. Шаблон представляет собой определенную фразу или ключевое слово, которое активирует команду.
6. Добавьте новые шаблоны голосовых команд, указывая соответствующую команду, которую они должны активировать. Например, если вы хотите добавить голосовую команду для телепортации игрока к определенной координате, вы можете добавить следующий шаблон: «tp %player% to %x% %y% %z%», где «%player%» — имя игрока, «%x%», «%y%» и «%z%» — координаты.
7. Сохраните файл конфигурации и перезапустите сервер Minecraft.
8. Теперь вы можете использовать голосовые команды в игре. Просто произнесите шаблон фразы, которая соответствует активации команды. Например, если вы добавили голосовую команду для телепортации, произнесите фразу «телепортация к координатам 100 64 200», чтобы телепортироваться к указанным координатам.
Заметьте, что для использования голосовых команд вам может потребоваться настроить контроль голоса и распознавание речи в плагине chatty. Эти настройки зависят от используемых плагинов и программ для распознавания речи.
| Шаблон | Команда |
|---|---|
| «телепортация к координатам %x% %y% %z%» | /tp %player% %x% %y% %z% |
| «убить игрока %player%» | /kill %player% |
| «выдать предмет %item% игроку %player%» | /give %player% %item% |
В приведенной таблице приведены некоторые примеры шаблонов голосовых команд и соответствующих команд в Minecraft. Вы можете создавать собственные шаблоны и команды, а также редактировать существующие в файле конфигурации плагина chatty.
Настройка голосовых команд в плагине chatty позволяет добавить новые возможности в игру и сделать ее более интерактивной. Произнося фразы, которые соответствуют активации команд, вы можете выполнять различные действия, не прибегая к использованию чата в игре.
Подробное руководство для успешной настройки плагина чатти
Настройка плагина чатти может показаться сложной задачей, но с помощью этого подробного руководства вы сможете успешно настроить его на своем веб-сайте. В следующих шагах я опишу, как правильно настроить плагин чатти и сделать его работающим.
Шаг 1: Установка и активация плагина
Первым шагом является установка и активация плагина чатти. Для этого вам нужно зайти в свою административную панель сайта WordPress, выбрать раздел «Плагины» и найти плагин чатти. После того, как вы найдете его, нажмите на кнопку «Установить» и затем «Активировать».
Шаг 2: Создание аккаунта чатти
Чтобы ваш плагин чатти заработал, вам нужно создать аккаунт на сайте чатти. Перейдите на сайт чатти, найдите раздел «Регистрация» и заполните необходимую информацию, чтобы создать учетную запись.
Шаг 3: Получение API-ключа
После создания аккаунта вам нужно получить API-ключ от чатти. Для этого зайдите на сайт чатти, войдите в свой аккаунт, перейдите в раздел «Настройки» и найдите вкладку «API». Нажмите на кнопку «Создать новый ключ», чтобы получить API-ключ.
Шаг 4: Подключение плагина к вашему аккаунту
Вернитесь в административную панель вашего сайта WordPress и найдите раздел «Chaty» в боковом меню. Вам будет предложено ввести ваш API-ключ, который вы получили на предыдущем шаге. Введите ключ и сохраните настройки.
Шаг 5: Настройка внешнего вида и функциональности
Теперь вы можете настроить внешний вид и функциональность плагина чатти. В разделе «Настройки» плагина вы сможете выбрать цвета, размеры и положение панели чата, а также настроить другие параметры, такие как язык чата и поведение чата при загрузке страницы.
Рекомендуется: выделять важные советы или инструкции жирным шрифтом.
Пожалуйста, убедитесь, что вы правильно следуете всем указанным выше шагам, чтобы успешно настроить плагин чатти на вашем веб-сайте. Если у вас возникнут проблемы, вы всегда можете обратиться в службу поддержки чатти для получения дополнительной помощи.
Download & Installation
You can download Chatty from it’s .
The download simply consists of a -file which you should
extract wherever you want to have Chatty. The extracted files include a
which you should usually be able to double-click to
start the program (if Java is installed properly). (See
if Chatty won’t start.)
Update Chatty
If you already have an older version of Chatty and want to update, then
just replace all the files with the new ones in the .
Basicially just unzip the into the same folder and overwrite
all files if asked (unless you have some custom icons or sounds that have the same name).
You can also unzip it into a new folder (just make sure you don’t use the old version anymore).
Your settings are saved seperately in the settings directory
and are not lost when you upgrade to a new version. The new version should normally
automatically use the same settings without you needing to change anything.
If you are interested in what your settings directory is,
enter in Chatty. There is also a
folder in there with of the settings.
Please check out the Release Information for any changes in a new version that
may require your attention.
Note: If you downgrade to an older version of Chatty, some settings (that the older
version didn’t have yet) may be lost. So make sure you don’t run old versions of Chatty
without knowing what you are doing, if you have changed settings unique to newer versions.
File & Directory Commands
-
The tilde (~) symbol stands for your home directory. If you are user, then the tilde (~) stands for /home/user
-
pwd: The pwd command will allow you to know in which directory you’re located (pwd stands for «print working directory»). Example: «pwd» in the Desktop directory will show «~/Desktop». Note that the GNOME Terminal also displays this information in the title bar of its window. A useful gnemonic is «present working directory.»
-
ls: The ls command will show you (‘list’) the files in your current directory. Used with certain options, you can see sizes of files, when files were made, and permissions of files. Example: «ls ~» will show you the files that are in your home directory.
-
cd: The cd command will allow you to change directories. When you open a terminal you will be in your home directory. To move around the file system you will use cd. Examples:
-
To navigate into the root directory, use «cd /»
-
To navigate to your home directory, use «cd» or «cd ~»
-
To navigate up one directory level, use «cd ..»
-
-
To navigate to the previous directory (or back), use «cd -»
-
To navigate through multiple levels of directory at once, specify the full directory path that you want to go to. For example, use, «cd /var/www» to go directly to the /www subdirectory of /var/. As another example, «cd ~/Desktop» will move you to the Desktop subdirectory inside your home directory.
-
-
cp: The cp command will make a copy of a file for you. Example: «cp file foo» will make an exact copy of «file» and name it «foo», but the file «file» will still be there. If you are copying a directory, you must use «cp -r directory foo» (copy recursively). (To understand what «recursively» means, think of it this way: to copy the directory and all its files and subdirectories and all their files and subdirectories of the subdirectories and all their files, and on and on, «recursively»)
-
mv: The mv command will move a file to a different location or will rename a file. Examples are as follows: «mv file foo» will rename the file «file» to «foo». «mv foo ~/Desktop» will move the file «foo» to your Desktop directory, but it will not rename it. You must specify a new file name to rename a file.
- To save on typing, you can substitute ‘~’ in place of the home directory.
-
Note that if you are using mv with sudo you can use the ~ shortcut, because the terminal expands the ~ to your home directory. However, when you open a root shell with sudo -i or sudo -s, ~ will refer to the root account’s home directory, not your own.
-
rm: Use this command to remove or delete a file in your directory.
-
rmdir: The rmdir command will delete an empty directory. To delete a directory and all of its contents recursively, use rm -r instead.
-
mkdir: The mkdir command will allow you to create directories. Example: «mkdir music» will create a directory called «music».


Here is an example of when it would be necessary to execute a command with administrative privileges. Let’s suppose that another user has accidentally moved one of your documents from your Documents directory to the root directory. Normally, to move the document back, you would type mv /mydoc.odt ~/Documents/mydoc.odt, but by default you are not allowed to modify files outside your home directory. To get around this, you would type sudo mv /mydoc.odt ~/Documents/mydoc.odt. This will successfully move the document back to its correct location, provided that you have administrative privileges.
Конфигурация плагина chatty
Плагин chatty предлагает широкий спектр настроек для настройки работы с чатом. В этом разделе мы рассмотрим основные параметры конфигурации и их функциональность.
Имена пользователей
Один из важных параметров плагина chatty — это настройка имен пользователей. Вы можете настроить, как отображается имя пользователя в чате, а также какие названия и иконки использовать для определенных групп пользователей.
Для настройки имен пользователей вам нужно:
- Открыть настройки плагина chatty.
- Перейти в раздел «Имена пользователей».
- Выбрать опцию «Изменить имена пользователей».
- Внести желаемые изменения, например, указать название группы и соответствующую иконку.
- Сохранить настройки.
Фильтрация сообщений
Если вы хотите ограничить видимость или отправку сообщений определенным пользователям или группам, вы можете использовать функцию фильтрации сообщений. Для этого вам нужно:
- Открыть настройки плагина chatty.
- Перейти в раздел «Фильтрация сообщений».
- Выбрать опцию «Настроить фильтр сообщений».
- Выбрать пользователей или группы, которым вы хотите разрешить или запретить отправку сообщений.
- Сохранить настройки.
Уведомления
Плагин chatty позволяет настроить уведомления о новых сообщениях или событиях в чате. Вы можете указать, какие типы уведомлений вы хотите получать, и способ их отображения.
Для настройки уведомлений:
- Открыть настройки плагина chatty.
- Перейти в раздел «Уведомления».
- Выбрать опцию «Настроить уведомления».
- Выбрать типы уведомлений, которые вы хотите получать (например, новое сообщение или новое приглашение в чат).
- Выбрать способ отображения уведомлений (например, всплывающее окно или звуковой сигнал).
- Сохранить настройки.
Настройка плагина chatty позволяет максимально адаптировать его под ваши потребности и обеспечить комфортное использование чата.
Conclusion
Congratulations, you’ve built a Python chatbot using the ChatterBot library! Your chatbot isn’t a smarty plant just yet, but everyone has to start somewhere. You already helped it grow by training the chatbot with preprocessed conversation data from a WhatsApp chat export.
In this tutorial, you learned how to:
- Build a command-line chatbot with ChatterBot
- Train a chatbot to customize its responses
- Export your WhatsApp chat history
- Perform data cleaning on the chat export using regular expressions
- Retrain the chatbot with industry-specific data
Because the industry-specific chat data in the provided WhatsApp chat export focused on houseplants, now has some opinions on houseplant care. It’ll readily share them with you if you ask about it—or really, when you ask about anything.
With big data comes big results! You can imagine that training your chatbot with more input data, particularly more relevant data, will produce better results.
Finished main.py
That’s the basic logic of using Qt Designer and PyQt to design and develop a GUI application.
You can safely edit your design and re-run the command without fear of your main code getting lost or overwritten.
Final notes
All the code in this example is done in the main UI thread, which is often a bad idea — especially if you have something that takes time to finish. For example if the function took long time our UI would be frozen the whole time. In one of the future tutorials I’ll cover PyQt threading, this one is focused on just the bare basics without too much unnecessary things. But please keep in mind that anything that doing stuff in main UI thread is generally a bad idea.
All the code and files used can be found in this gist: https://gist.github.com/nikolak/615def9e197d5db04bef
Useful links:
Python Inheritance SO thread: http://stackoverflow.com/questions/576169/understanding-python-super-with-init-methods
PyQt reference guide: http://pyqt.sourceforge.net/Docs/PyQt4/
Booting into RCM
The Switch has a hidden recovery mode called . The exploit abuses a critical error from RCM, where binaries sent to the console have their data read before checking for signatures. As such, you can run any custom code on your Switch as long as it’s vulnerable to this exploit. However, these steps won’t work on patched models despite RCM also existing on such consoles.
Step 1: Open the TegraRcmGUI installer (), go through the installation wizard, and start TegraRcmGUI.
Step 2: In the tab, click on and follow the installation instructions.
Step 3: After the drivers have been installed, connect your Switch to your computer using a USB-C cable.
Step 4: Hold the button to enter the power menu, select and then select . Keep your Switch connected to your computer.
Step 5: Insert your RCM jig into the right side Joy-Con rail, make sure it is seated securely at the base.
Step 6: Hold and press the button.
If you see the Switch icon turn green with in the TegraRcmGUI window, your console has successfully booted into RCM mode.
Once you have successfully booted into RCM mode, you can now remove the RCM jig from the console.
Testing (Added November 26th, 2022)
I want to talk to you about testing for a moment. I’ve made a few additions to the project for the purposes of getting my mentorship students up and running faster.
- There are two ways to write tests in this project.
- Stateless testing: You can write your tests like this, similarly to how most testing documentation will tell you to write them. This is the simplest way, and it works well for basic unit tests against stateless functions or components.
-
Stateful Testing (Given-When-Then style): This is how I write my High-Value Tests (HVTs) (also known as Acceptance Tests). You can use the Given-When-Then Gherkins format enabled by . I’ve provided a basic example which you can find within the folder here. For a real-world example of this, check out this folder and read this article.
This is my preferred approach most of the time. Especially for stateful tests.
- (Recommendation): Use the stateless testing approach when you’re testing stateless functions or domain objects like value objects and entities.
Шаг 6: Добавление команд
Добавление команд в плагин Chatty позволит вам настроить ответы бота на определенные команды чата. Это можно использовать для создания интерактивных и увлекательных взаимодействий с вашими зрителями.
Вот как добавить команды в плагин Chatty:
-
Откройте файл конфигурации плагина Chatty, который вы создали на предыдущем шаге.
-
Найдите секцию «commands» в файле конфигурации.
-
Внутри секции «commands» добавьте новую команду в формате:
Например:
-
Сохраните файл конфигурации.
-
Перезапустите плагин Chatty, чтобы изменения вступили в силу.
Теперь, когда зритель введет команду !hello в чате, бот автоматически ответит «Привет, зрители!».
Вы можете добавить сколько угодно команд, каждая из которых будет вызывать свой уникальный ответ бота. Например, вы можете добавить команду для вывода правил чата, команду для запуска мини-игры и т. д.


Не забудьте сохранить и перезапустить плагин Chatty после каждого изменения файла конфигурации, чтобы увидеть результаты добавленных команд.
Помните, что команды чувствительны к регистру. Например, команда !hello и команда !Hello будут восприниматься как разные команды ботом.
Также, вы можете использовать специальные переменные в ответе бота, чтобы интегрировать информацию о зрителе или данные из других источников. Например, вы можете использовать переменную {viewer} для отображения имени зрителя, отправившего команду.
Вот некоторые примеры использования переменных:
- — бот поприветствует зрителя по имени.
- — бот выведет информацию о погоде в указанном городе. Переменные {city} и {weather} будут заменены соответствующими значениями.
Теперь вы знаете, как добавлять команды в плагин Chatty и использовать переменные для создания интерактивных взаимодействий с вашими зрителями.
Шаг 5: Создание и управление каналами
После установки и настройки плагина Chatty, вы можете создавать и управлять каналами по своему усмотрению. Каналы — это места, где пользователи могут общаться и обмениваться информацией.
Для создания нового канала в Chatty выполните следующие действия:
- Откройте панель администратора Chatty, щелкнув на значок плагина в панели управления WordPress.
- Выберите вкладку «Каналы» или «Channels».
- Нажмите кнопку «Создать канал» или «Create Channel».
- Введите название канала и необходимую информацию о нем.
- Нажмите кнопку «Сохранить» или «Save», чтобы создать канал.
После создания канала он будет отображаться в списке каналов, доступных для пользователей. Вы можете изменить настройки канала, добавить или удалить участников и управлять правами доступа в любое время.
Для редактирования настроек канала в Chatty выполните следующие действия:
- Откройте панель администратора Chatty.
- Выберите вкладку «Каналы» или «Channels».
- Найдите нужный канал в списке и щелкните на него.
- Внесите необходимые изменения в настройки канала.
- Нажмите кнопку «Сохранить» или «Save», чтобы применить изменения.
Вы также можете добавлять и удалять участников канала, устанавливать ограничения на отправку сообщений и редактировать права доступа канала во время его редактирования.
Управление каналами в плагине Chatty предоставляет вам гибкость и контроль над процессом общения пользователей на вашем сайте. Вы можете создавать новые каналы для разных групп пользователей и настраивать доступ к ним по своему усмотрению.
3) Verify the Installation
There are several ways to verify the PostgreSQL installation. You can try to connect to the PostgreSQL database server from any client application e.g., psql and pgAdmin.
The quick way to verify the installation is through the psql program.
First, click the application to launch it. The psql command-line program will display.
Second, enter all the necessary information such as the server, database, port, username, and password. To accept the default, you can press Enter. Note that you should provide the password that you entered during installing the PostgreSQL.
Third, issue the command you will see the following output:
Congratulation! you’ve successfully installed PostgreSQL database server on your local system. Let’s learn various ways to connect to PostgreSQL database server.