

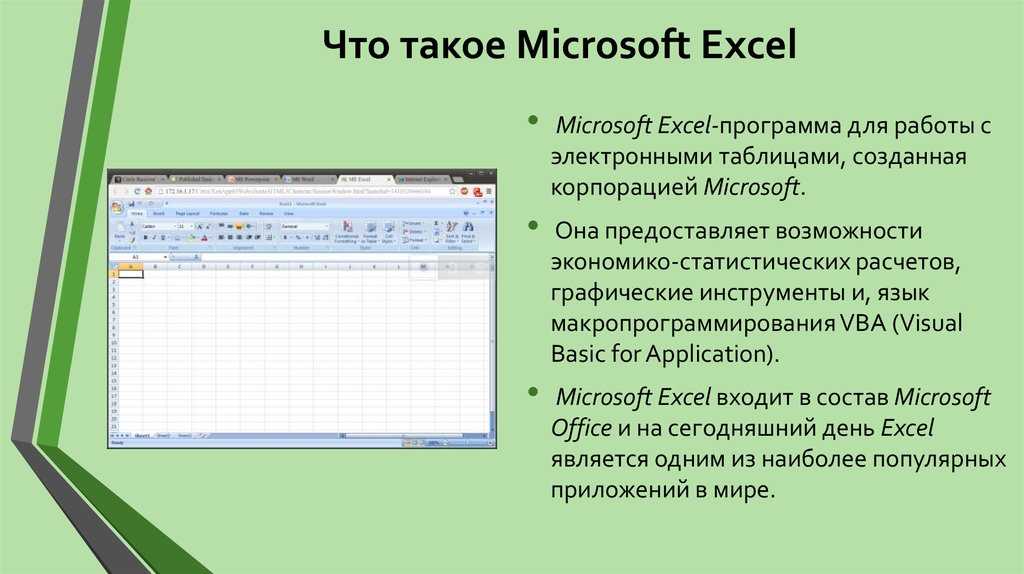
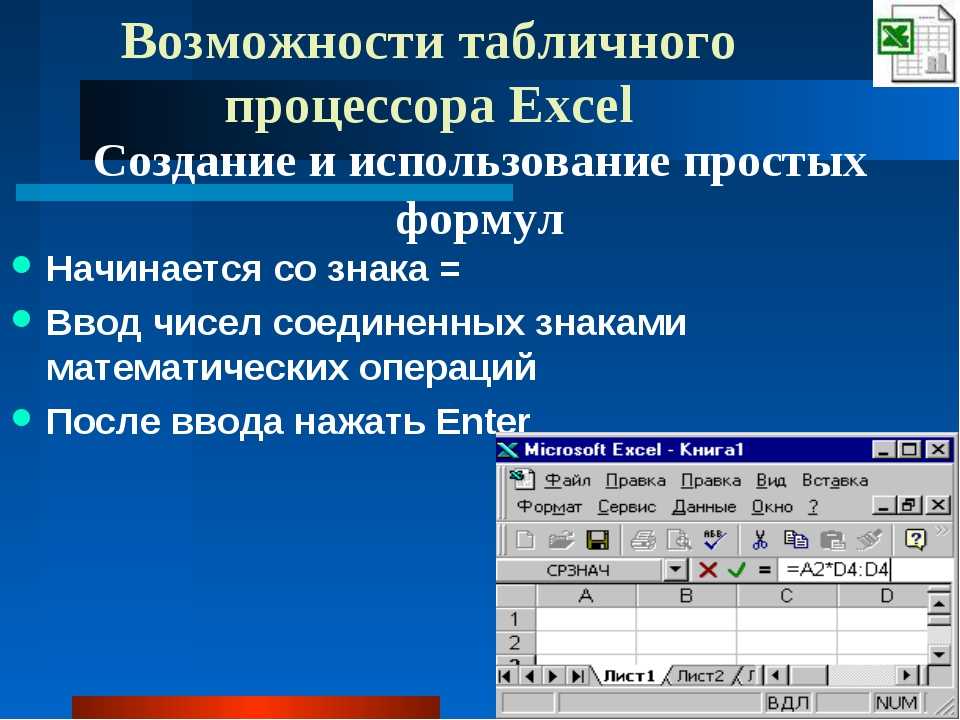
Power Query
Power Query allows you to connect data from different sources but instead of only allowing you to connect to internal resources, you can merge data from both online (including public) locations and private locations such as your work systems.
Let’s say we want to report on the number of electric vehicles sold in the US. To get started we launch Excel. Click on the Power Query tab and then click Online Search. In the search tab we type in something like electric car sales. In the results pane we can see a number of public data sources. If we hover over a source we can see the data Excel would import (Figure 1). Once we find a data set we wish to import we click it to import it into Excel. If we hover over the data set before importing it we can also determine which columns of data get imported and even filter out results.
Once the data has been imported we have a Query Settings section available on the page. This allows us to manually refresh the data and we also have the ability to filter the data by using the Filter & Shape button (Figure 2).
We can also perform two queries and merge them together. If we run through and perform another online query – this time for electric car sales in Germany and add it to our Excel sheet (Figure 3) we can then click on the Merge button under the Power Query menu.
From the Merge window we select our two queries and then click on the column that will be merged – in this case we want to view all models (Figure 4). Once we click OK we will see the query editor which will allow us to filter out data we don’t need to keep. Click Done and you’ll be taken to your new worksheet with the merged results (Figure 5).
Many other sources can be queried and mashed together – this just touches the tip of what you can do with Power Query.
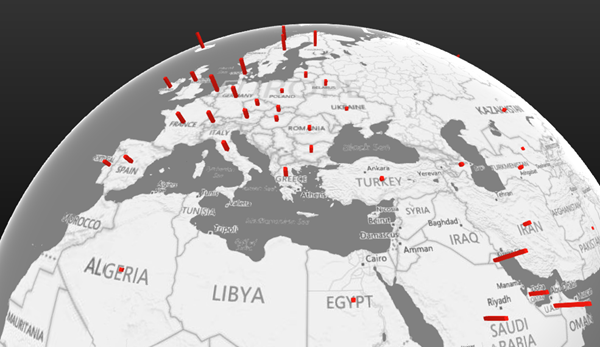
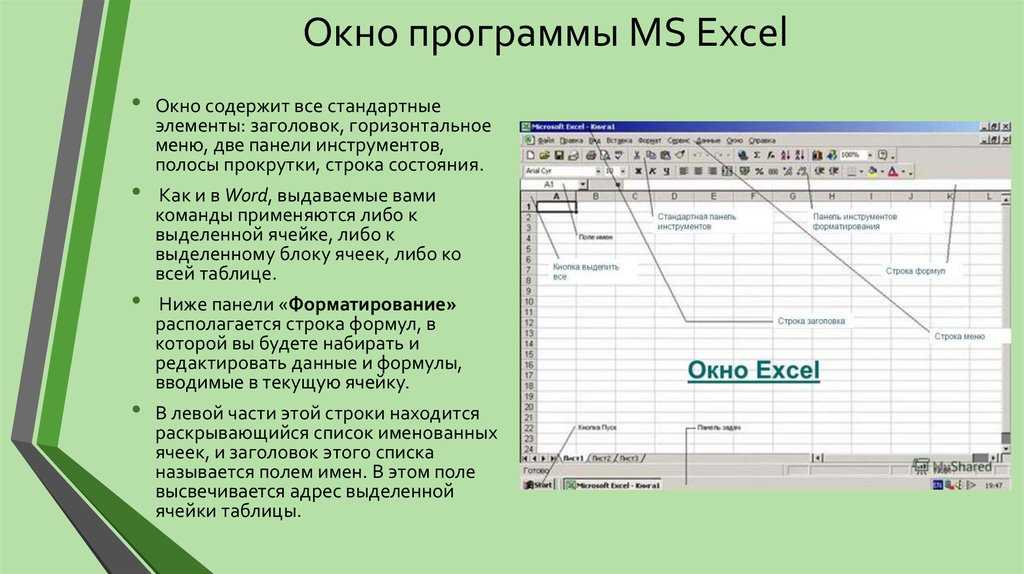
Слои карты
Слои используются для совмещения разнородных типов визуализации. Скажем, нужно одновременно показать столбики по одному показателю и тепловую карту по другому. На одном слое это сделать невозможно. На разных – легко.
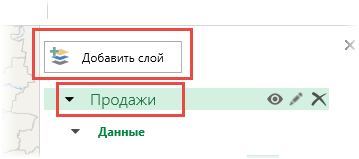
Назовем имеющийся слой Продажи и создадим новый .
В новом слое визуализируем затраты на рекламу, сделав их столбиками.

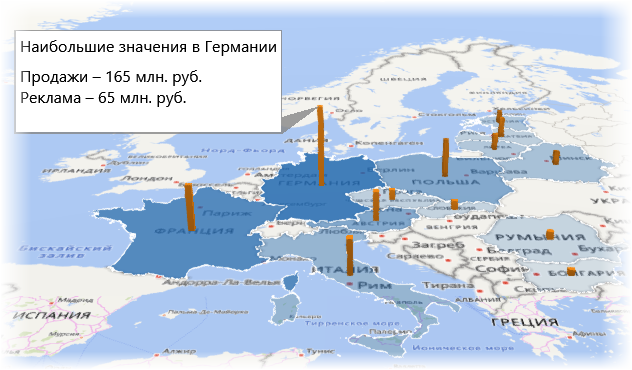
Теперь интенсивность заливки контура страны показывает продажи, высота столбика – затраты на рекламу. Можно добавить легенду.
Разумным будет акцентировать внимание на нужном регионе с помощью примечания. Правой кнопкой кликаем по элементу и вносим пояснение
К сожалению, построение 3д-карты происходит в отдельном окне, ее нельзя поместить на лист Excel. Но если вам нужно отобразить карту именно на листе эксель или в power point, сделайте скриншот с помощью вот этого фотоаппарата на ленте.
Естественно, что связки с данными больше нет. Зато есть красивый рисунок. А данные легко обновить и снова вставить картинку.
Step by Step
Open the data file, click inside the data and choose Insert – Power Map.
Depending upon the connection speed it may take a while to open the 3D map window. Initially it will show a globe with all the countries marked. It automatically understood that the country column contains data which can be plotted on the map.
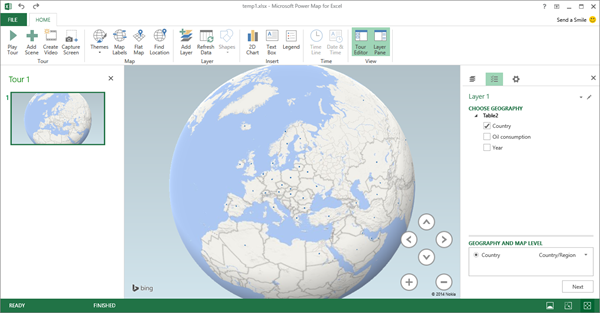
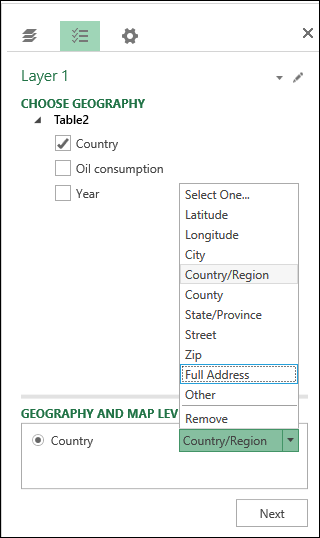
For the time being close the Tour section on the left side. On the right side pane, it shows that Country is already selected. It is mapped to the geographical type Country/Region. Open that dropdown to see what else is understood as a geographical attribute.
The next step is to plot our data. So click Next and choose the Per Capita Consumption field. Now each country will show a bar. Close the legend window so that you can see the globe clearly.
You can rotate the globe with mouse. Zoom in or out with Scroll Wheel or using the on screen buttons. It is also good to play with different perspective angles and get the feel of it.
Pressing Alt and dragging mouse in the map area gives you a free form 3D view transformation. Get used to it.
What is this showing? If you see the data, we have data for multiple years for each country. Right now it is showing the TOTAL of all the consumption numbers for all years for each country. Although this does not make much sense from the point of view of further analysis – at least you can understand how this mapping tool works.
We will refine this visualization soon. But in this article, let us just see how to tweak the view.
Power Query
Power Query — это еще один мощный инструмент для анализа данных, который можно использовать для извлечения данных из огромного диапазона источников данных, для очистки и преобразования этих данных, а также для доставки этих данных в доступный формат. Power Query важен как для постоянных, так и для профессиональных пользователей. Обычные пользователи могут лучше контролировать столбцы и формулы. , инструменты фильтрации, изменение типов данных на лету, чтобы превратить необработанную информацию в ценную информацию. С Power Query вы можете:
- Находите и соединяйте данные из огромного количества источников, объединяйте и объединяйте эти данные в соответствии с вашими требованиями или используйте интегрированные инструменты моделирования Power Pivot и Power View для дальнейшего продвижения ваших данных.
- Используйте встроенный анализатор JSON о том, как создать массивную визуализацию данных на основе анализа больших данных
- Делитесь своими запросами и управляйте ими из своих источников, а также экспортируйте их в Power BI или в свой бизнес.
- Ищите в Интернете общедоступные источники данных, включая Wikipedia, Azure и Data.gov.
- Отключите ваши сводные таблицы.
Диапазон источников данных Power Query очень широк:
- веб-страница
- Excel или CSV файл
- XML-файл
- Текстовый файл
- скоросшиватель
- База данных SQL Server
- База данных Microsoft Azure SQL
- Доступ к базе данных
- База данных Oracle
- База данных IBM DB2
- База данных MySQL
- База данных PostgreSQL
- База данных Sybase
- База данных Teradata
- Список SharePoint
- OData feed
- Microsoft Azure Marketplace
- Файл Hadoop (HDFS)
- Microsoft Azure HDInsight
- Microsoft Azure Table Storage
- Active Directory
- Microsoft Exchange
Как и в случае Power Pivot, Power Query также выступает в качестве центрального инструмента для Power BI, а также предоставляет таблицы визуализации для Power Map и Power View. Как упоминалось выше, Power Query также можно использовать для отмены сводных таблиц, возвращая их в исходное состояние для дальнейшего анализа.

Загрузка Power Query
Power Query также появился в виде надстройки, а по состоянию на Office 2016 включен в качестве функции по умолчанию. Опять же, вы просто должны включить его.
Office 2016: откройте Excel и перейдите в Файл> Параметры> Надстройки . В поле « Управление» в нижней части экрана выберите « Надстройки COM» , а затем « Перейти» . Убедитесь, что выбран Microsoft Office Power Query для Office 2016 , и нажмите « ОК» . Инструменты Power Query находятся на вкладке Data .
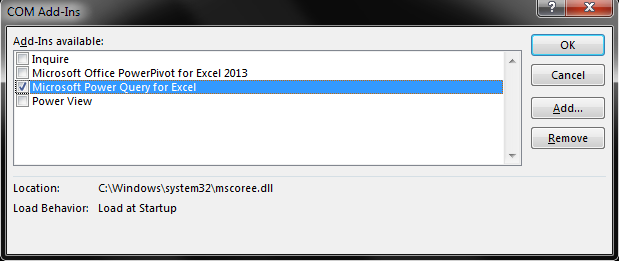
Office 2010/2013: загрузите Microsoft Power Query для Excel . Найдите вашу загрузку и установите. После установки вы должны увидеть вкладку Power Query. Если нет, перейдите в Файл> Параметры> Надстройки . В поле « Управление» в нижней части экрана выберите « Надстройки COM» , а затем « Перейти» . Убедитесь, что выбран Microsoft Power Query for Excel , и нажмите « ОК» .
How do I create a power map in Excel?
Click any cell in the table. Click Insert > Map. Clicking Map for the first time automatically enables Power Map. Power Map uses Bing to geocode your data based on its geographic properties.
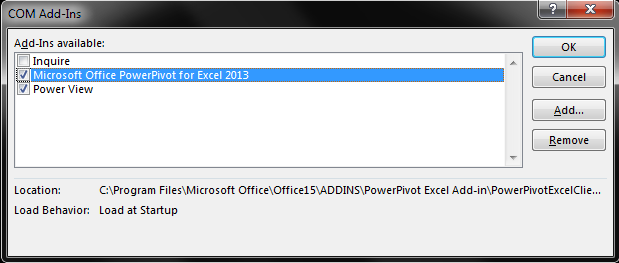
Is PowerPivot available in Excel 2013?
In Microsoft Excel 2013, the PowerPivot add-in is available when using Microsoft Office Professional Plus. To enable PowerPivot: From the File menu, select Options, and then Add-Ins. Check the box next to Microsoft Office PowerPivot for Excel 2013, and then click OK.
How do I create a 3D map in Excel 2013?
To do this, go to File > Option > Add-Ins. You should see a pop-up window as below. In the dropdown at the bottom of the window select COM Add-ins and click GO: Now, check Microsoft Power Map and click on OK button to activate it.
How do I create a 3D map in Excel dashboard?
Creating Excel 3D Maps If your data is in an Excel worksheet then select your data range > Insert > Power Map/3D Map. Excel will load the data to Power Pivot/Data model and open the 3D Map window. If your data is already in Power Pivot/Data model you can go straight to Insert > Power Map/3D Map.
Does Excel have a mapping feature?
Excel has built-in support for adding chart and map combinations – also as known as map charts – since Excel 2016. A map chart is an easy-to-use tool that is great for when you want to visualize geographic data on a map.
Добавление созданной карты на лист в Microsoft Excel
Часто трехмерную карту создают для того, чтобы вывести ее рядом с таблицей отчетности в Экселе и получить наглядную демонстрацию всего проекта, чтобы при просмотре не возникало вопросов и вся статистика находилась как на ладони. К сожалению, функции экспорта в один клик с автоматическим обновлением данных на карте пока что нет, поэтому придется делать все вручную.
-
Каждый раз при открытии карты вы можете нажать «Обновить данные» для актуализации информации в графиках, поскольку изменения в таблице здесь не подтягиваются автоматически.
-
После этого нажмите «Захватить экран». Эта кнопка сделает снимок вашей карты, поместит его в хранилище Excel как изображение, а также сохранит в буфере обмена.
-
-
Вернитесь к таблице и нажмите сочетание клавиш Ctrl + V, чтобы вставить скопированную только что карту.
-
Выделите ее и справа выберите инструмент «Обрезать», чтобы удалить все лишнее, если были захвачены те страны или города, которых нет в вашей диаграмме. Если в таблице будут изменения, эту карту нужно удалить, вернуться к редактору, обновить там данные и снова сделать снимок уже новой карты.


Вы получили обширные инструкции по использованию основных инструментов 3Д-карты в Microsoft Excel. Этого должно быть достаточно для того, чтобы сформировать свою первую продвинутую диаграмму и научиться профессионально управлять этим средством в своих целях как в Экселе, так и в плане формирования отдельных видео и слайд-шоу.
Cannot see all countries – so flatten the world!
The data we have is for all countries. We can see only half of them at a time. No problem. Click on the Flatten option and it becomes a flat map with a beautiful animation.
Of course flat map has its own problem. It is a 3D perspective kind of map. So if you keep it absolutely like a top view, you cannot see the bars at all. If you keep in perspective mode, some countries will be near to you and some very far away. Therefore visual comparison of the various bars is always a bit tricky.

The idea is to find an overall view to show the global picture. But DO NOT use that view to form opinion about relative values of bars. To do a comparison, you must ZOOM IN. That reduces the distortion related ambiguity and lends itself to better visual comparisons.
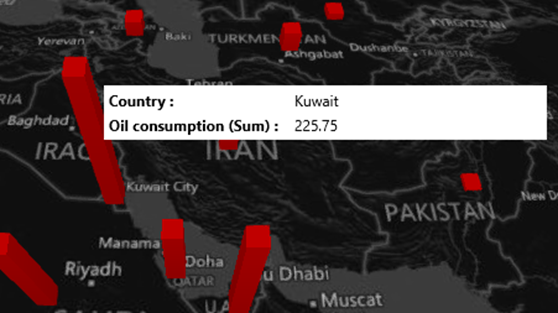
Of course, hovering the mouse on any plotted element will show a helpful tooltip with the number shown clearly.
How do you draw a good map?
My steps in drawing a map are pretty consistent:
- sketch an outline.
- ink in the outlines.
- add detail lines.
- block in dark areas.
- add overall light and shade.
- lay in base colours.
- add detailed light and shade.
- label.
Can I create a map with pins?
Create a Custom Google Pin Map Use Google MyMaps and enter locations one at a time. Use Google Fusion tables (soon to be turned off) to map lots of locations with some customizations. Find a programmer (or write code yourself) to create a custom map. Use EasyMapMaker to create a custom map for you.
How do I automatically update Google Maps?
2 Answers. You can use the Google Spreadsheets add-on called Geosheets to create your map. That way your map will automatically update in realtime whenever data changes in your spreadsheet.
Is BatchGeo safe?
How we secure BatchGeo servers. BatchGeo uses the best and most secure cloud platforms. Our servers are routinely patched and kept up to date with the most secure versions of required software. Passwords are never kept in plain text—they are always salted and hashed before storing in our database.
Microsoft 365
In our personal and business lives, we’re becoming more connected than ever. Microsoft 365 is the world-class cloud-based platform which helps you to achieve your goals from anywhere.
Microsoft 365 is a suite of apps bringing together all the greatest Office applications in one cloud-based platform, enabling your people to connect, collaborate and get things done from anywhere.
Applications that help you stay connected and get things done include:
WordMicrosoft’s iconic word processing program allows you to create and share documents, now with intelligent document support.
ExcelSimplify complex data with the world’s most-used spreadsheet program.
PowerPointCreate and share outstanding presentations.
TeamsBring everyone together with secure video & call conferencing, instant messaging, and collaboration.
One DriveSave files securely and access them at any time, from anywhere.
SharePointCreate team sites to share information, files, and resources.
Plus, other useful applications such as Exchange, Intune and Azure Information Protection.
Speak to us today to find out how which Microsoft applications could be deployed in your business.
Different ways of showing the numbers
This data can be shown in five different ways.

The first one is what we are seeing now. Simple bar chart.
The second one will show side-by-side bar charts in case there was a category. We will see categories later.
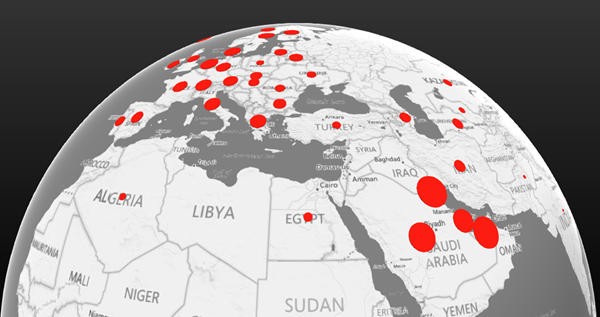
Third one is like a bubble chart.
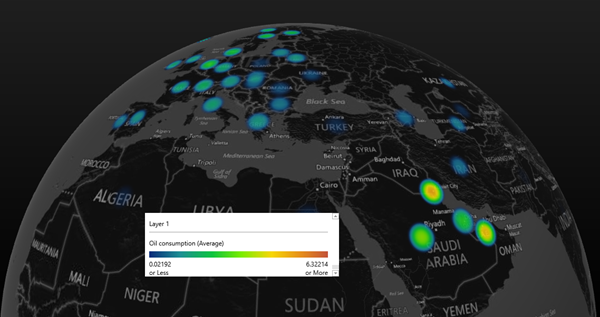
The next one is a heat map. It takes into account the lowest and highest value and creates a color coding scale. To show the scale choose Legend button. (I have used the Black theme to show the color coding more vividly)
Finally, we have the Region visualization. This does not show the data, but it actually highlights each country and its boundary. The color given to each country will differ – depending upon the number associated with it (average oil consumption).
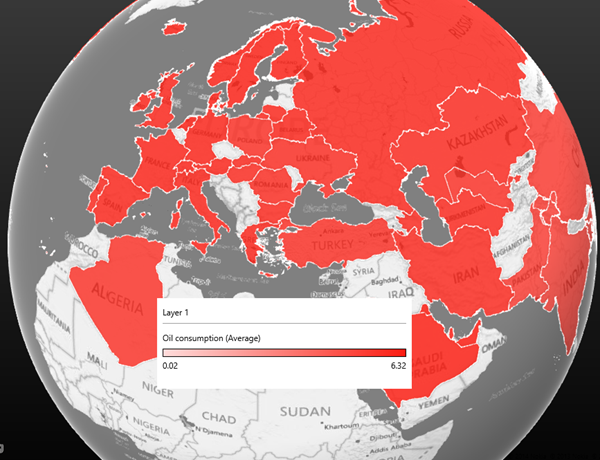
Geography detection errors
Sometimes, the names of countries, cities, etc. are not understood due to spelling mistakes, changed names or some other reasons. The accuracy with which the geography information was plotted is shown in the top right corner in the Layer Pane (right side window).
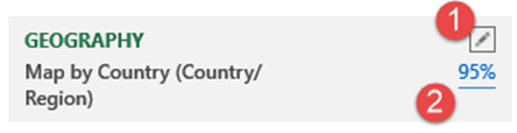
The first area (pencil icon) takes you back to step 1 so that you can choose a different geographical representation. In our case we have only one column containing country. However in real life data you will have Country, State, Region, District, City and so on. By going to the first step, you can change the granularity of the map plot.
The second item (95%) shows the accuracy of geo-coding ( the number of items the map has understood and plotted correctly). If you want to see which 5% were not understood, click on that link.
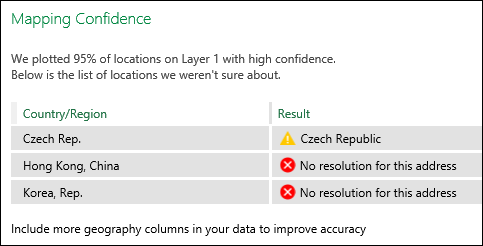
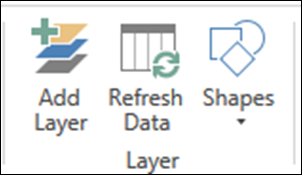
In this case it did not understand two abbreviations and the Hong Kong entry because it did not expect a comma in the name of a country. In such cases, you must go back to the data, make changes to the names as required and force Power Map to reinterpret the data by clicking the Refresh Data button.
Power Map
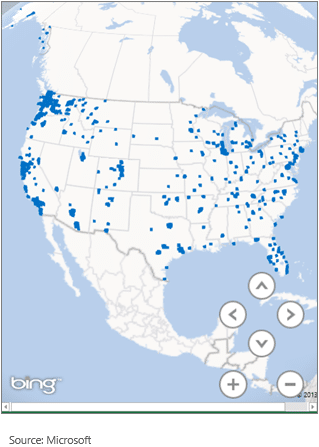
Power Map is another new feature in the Power BI suite of tools that lets you visualize data against a geographical map. Using a set of sample data from Microsoft you can see some pretty amazing maps (Figure 6). This figure shows the age of houses in Dallas Texas and the amount of energy used by them.
Let’s do a simple Power Map to show just how easy it is. I did a quick Power Query for the number of Law Enforcement employees by state from this URL (Figure 7). Click on the Insert menu and then Map. After a minute a map should pop up and start populating small blue squares on each state. This first screen will ask you to confirm the geo-location field. In our case, we are just using state names. Other geo-location data can be used such as addresses, regions, zip codes, and latitude and longitude.
Click the next button at the bottom. We can now decide what the blue square represents. We can click on the various fields to build our interactive map. In Figure 8, I’m displaying the sum of all male and female employees as a simple bar chart for each state. It’s now incredibly easy to see which states have the most (and fewest) law enforcement employees.
You can also add different layers and charts to the map. Clicking the 2D chart button will show a simple 2D chart overlaid on the map. If you want to create a movie you can click the Create Movie button to create a virtual walkthrough of the data.
This was just a brief overview of using Power Query and Power Map but even though these two tools are still in Preview they are very useful for finding, merging and visualizing your Excel data.
Introduction
Power Map is an Excel add-in under the Microsoft Power BI umbrella that extends the capability of Power View by enabling end users to visualize data in a 3D visualization format. It lets you plot geographical and temporal data visually, analyze it in 3D visualization format and create an interactive, guided cinematic tour to discover new insights by seeing your data in geographic space and seeing time-stamped data change over time (which you might not have seen in traditional 2D tables and charts) and to share it with others.
In my last article, Understanding Microsoft Power BI – Self Service BI Solutions, I talked in detail about Microsoft Power BI self-service solution and its different components.
In this article, I am going to talk about Power Map in detail, how to install it and how to get started using it.
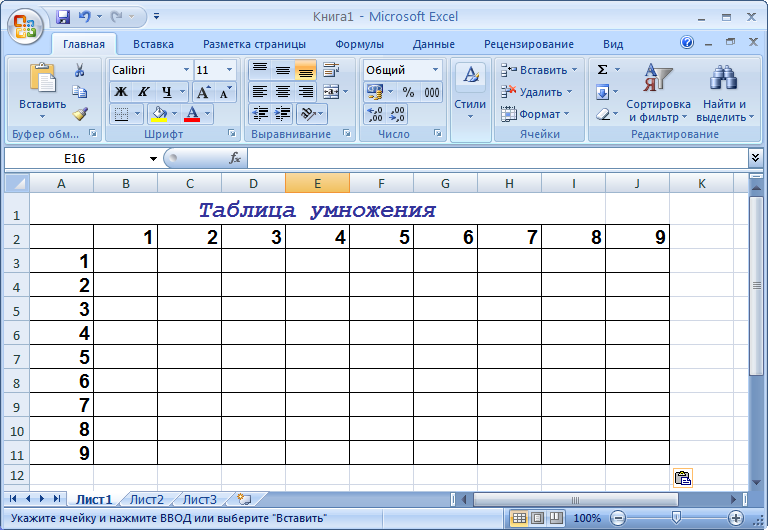
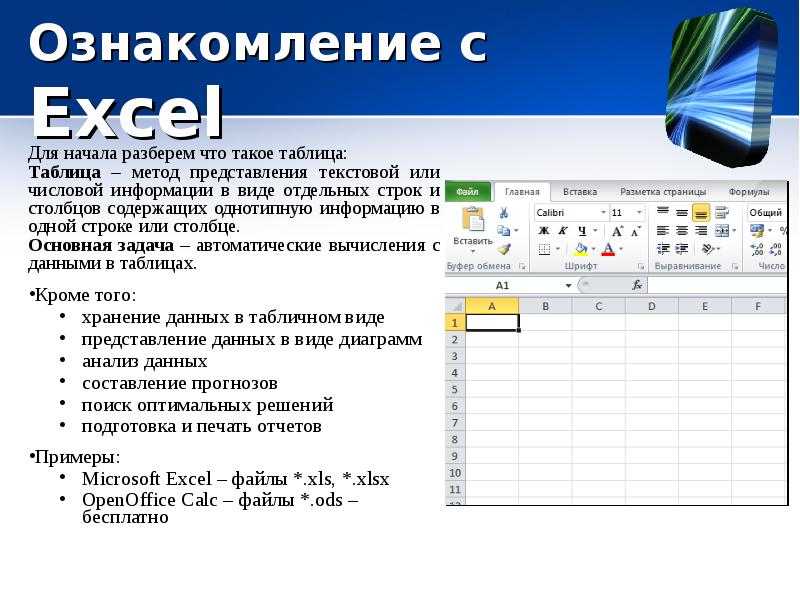
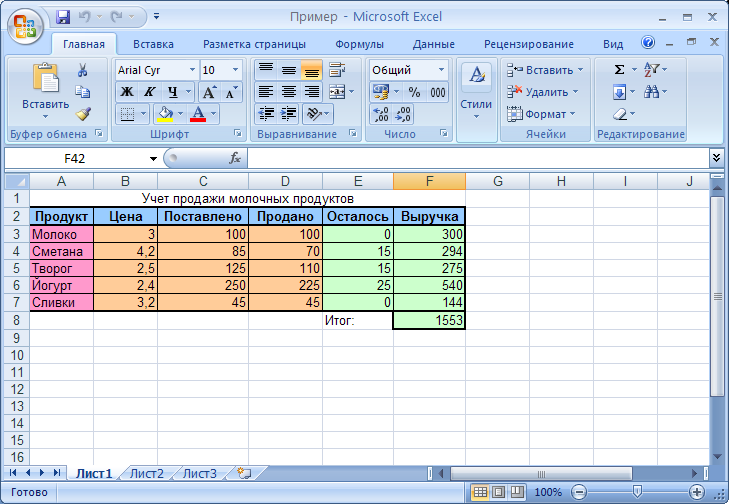
Создание таблицы по шаблону
Преимущество использования шаблонов Excel — это минимизация рутинных действий. Вам не придется тратить время на построение таблицы и заполнение ячеек заголовков строк и столбцов. Все уже сделано за вас. Многие шаблоны оформлены профессиональными дизайнерами, то есть таблица будет смотреться красиво и стильно. Ваша задача – лишь заполнить пустые ячейки: ввести в них текст или числа.
В базе Excel есть макеты под разные цели: для бизнеса, бухгалтерии, ведения домашнего хозяйства (например, списки покупок), планирования, учета, расписания, организации учебы и прочего. Достаточно выбрать то, что больше соответствует вашим задачам.
Как пользоваться готовыми макетами:
- Запустите программу Excel. Откройте вкладку «Файл» в верхнем меню. Перейдите в раздел «Создать».
- Выберите категорию, к которой относится будущая таблица.
- Выделите левой кнопкой мыши шаблон, который вам подходит.
- Нажмите на кнопку «Загрузить» на панели справа.
- Откроется новый файл Excel с выбранным шаблоном. Заполните его поля. Чтобы ввести текст в ячейку, выделите ее левой кнопкой мыши и начните набирать на клавиатуре.
- При необходимости меняйте размер и тип шрифта, цвет текста и ячейки. Все инструменты для форматирования находятся во вкладке «Главная».
Summary
Power Map is a fantastic visualisation feature within Microsoft Excel, that enables you to transform your data into a format for virtual viewing.
It is a great feature for analysing data and gathering insights from your spreadsheets, as well as allowing you to relay information to different audiences.
What does Power Map do?
The Power Map feature enables you to turn your rows of data into a 3D interactive map, with the ability to filter data using three different filters:
List
Range
Advanced
What could I use Power Map for?
In a nutshell, Power Map aids you in discovering insights you might not see in your usual two-dimensional tables and charts.
You may want to use Power Map for the following:
Map your data – You can plot numerous (more than a million!) rows of data visually, using Bing maps in 3D format. You can take this from either an Excel table or a Data Model in Excel.

Discover your insights – You can use Power Map to view your data in a geographic space and view time-stamped data change over time.
Share your stories – You can capture screenshots and build guided video tours, which you can then share with your audience. The unique visuals will help to engage your audiences.
How do I create a Power Map?
Power Map is simple to use and launched easily when using Excel.
NOTE: Your data will need to have geographical properties and be in a table format or in a Data Model. For example, you could have your data in rows and columns that have names of cities, counties and postcodes etc.
Follow the steps below to create a Power Map.
1. In Excel, open a workbook that has the table or Data Model data you’d like to use.
2. Click any cell in the table.
3. Then click Insert >Map.

NOTE: Clicking Maps for the first time will automatically enable Power Map.
Power Map will use Bing, to geocode your data based on its geographic properties.
4. After a few seconds, the globe will appear next to the first screen of the Layer Pane.
5. In the Layer Pane, you’ll then need to verify that fields are mapped correctly. Just click the drop-down arrow if you see any incorrectly mapped fields and you’ll be able to match them to the right geographic properties.
6. When Power Map plots the data, you’ll see dots appear on the globe.
7. Click Next to start collating and presenting your data on the map.
Further Information
If you have any questions about this or need assistance, then please contact the GCC Group Support Team on 0345 260 1151 or servicedesk@gccgroup.co.uk
Спарклайны
Спарклайны — это нарисованные прямо в ячейках миниатюрные диаграммы, наглядно отображающие динамику наших данных. Чтобы их создать, нажмите кнопку «График» (Line) или «Гистограмма» (Columns) в группе «Спарклайны» (Sparklines) на вкладке «Вставка» (Insert). В открывшемся окне укажите диапазон с исходными числовыми данными и ячейки, куда вы хотите вывести спарклайны.
![]()
После нажатия на кнопку «ОК» Microsoft Excel создаст их в указанных ячейках. На появившейся вкладке «Конструктор» (Design) можно дополнительно настроить их цвет, тип, включить отображение минимальных и максимальных значений и так далее.
Excel 3D Maps Explained
Note: 3D Maps in Excel is a data visualization tool available in Excel 2016 and 2019. Excel 2013 users can also use 3D Maps, but it is available as an add-in called Power Maps. If you are using Excel 2013, you will need to jump into Options > Add-Ins and enable Power Maps.
Imagine this, you want to impress your boss in your next presentation and graphically represent your data across different regions in a visually appealing way. You either thought that this is impossible to implement on Excel or advanced external tools are needed.
Until Now.
Not only are 3D Maps in Excel possible, they can be painlessly created in minutes if you follow this guide. So without further ado, let’s begin.
Three-dimensional Maps helps you visualize data in a different way and discover insights you might not see in traditional two-dimensional tables and charts.
Related:
Excel 3D Maps can analyze geographical data. For example, if you are trying to analyze and compare the population of countries around the world. Or maybe analyze crime stats for different towns or states.
With Excel 3D maps you can plot geographic and temporal data on a globe or custom map. You can show the data changing over time, build engaging, cinematic visual tours and importantly, any map you create can be shared with other people.
NOTEExcel 3D Maps use Microsoft Bing Maps to compile the map, so you will need to make sure you have an active internet connection.
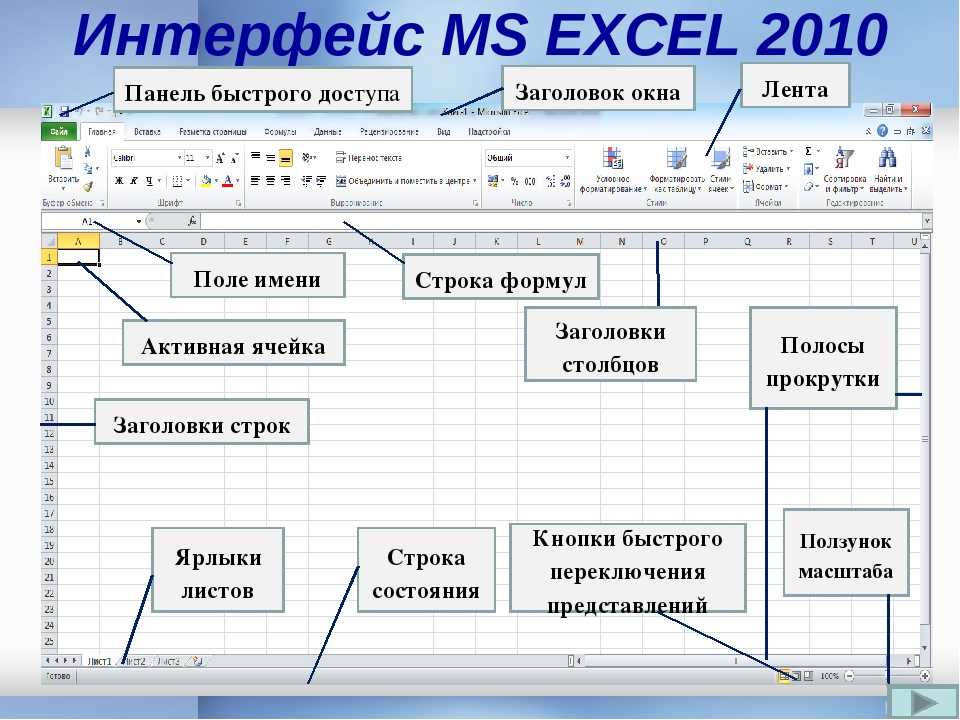
Создание визуализаций с помощью Microsoft Power Map
Для создания визуализаций с помощью Microsoft Power Map вам необходимо иметь данные, содержащие географические сведения, такие как страны, регионы или адреса. Эти данные должны быть организованы в формате таблицы в Excel.
Чтобы начать создание визуализации с помощью Microsoft Power Map, вам нужно открыть файл Excel и выбрать вкладку «Вставка» в верхней панели инструментов. Затем нажмите на кнопку «Карта», которая находится в разделе «3D Карта».
После нажатия на кнопку «Карта» откроется новое окно, в котором вы можете настроить параметры визуализации. Здесь вы можете выбрать поле данных для значения, цвета и легенды, а также задать параметры для оси времени, если требуется. Вы также можете настроить визуализацию, добавляя маркеры на карту или определяя трассы движения данных.
После настройки параметров визуализации нажмите на кнопку «Воспроизведение», чтобы увидеть анимированную визуализацию ваших данных на карте. Вы можете вращать, приближать или отдалить карту, чтобы получить более детальное представление о ваших данных.
Кроме того, вы можете добавить дополнительные элементы визуализации, такие как графики, таблицы данных или диаграммы, чтобы представить вашу информацию более полно.
Microsoft Power Map также позволяет сохранить визуализацию в формате видео или добавить ее в презентацию PowerPoint, что делает ее более удобной для презентации и обмена с другими людьми.
| Преимущества использования Microsoft Power Map: |
|---|
| — Возможность визуализации данных на карте для лучшего понимания и анализа информации |
| — Интерактивные и динамичные визуальные представления данных |
| — Возможность анимированной визуализации данных на карте |
| — Возможность настройки параметров визуализации для лучшего отображения данных |
| — Возможность сохранения визуализации в формате видео или добавления ее в презентацию PowerPoint |
В итоге, Microsoft Power Map является мощным инструментом для создания визуализаций данных на карте. Он позволяет вам представить вашу информацию более наглядно и дает возможность получить более глубокое понимание и анализ вашей информации.
Обзор электроинструмента
Мы рассмотрели ядро Power Excel и познакомили вас с инструментом бизнес-аналитики Power BI. Надеюсь, вы будете чувствовать себя комфортно, активируя их в своей системе и хорошо разыскивая их многочисленные функции.
Стоит помнить, что каждый из автономных инструментов входит в Power BI, а благодаря последним обновлениям Power BI для настольных компьютеров еще больше внимания уделяется Power Query и обширному набору инструментов Power View. Это означает, что вы можете исследовать и расширять собственное понимание каждого инструмента, обладая глубокими знаниями о том, что его можно развернуть в одном мощном инструменте бизнес-аналитики.
Какой ваш любимый инструмент Excel? Вы используете настольный компьютер или интегрированный Power BI? Дайте нам знать ниже.
Installing Power Map Excel Add-in
The Power Map (code name for this feature was “GeoFlow”) is a free Excel add-in (supported in Excel 2013) that can be installed from the Microsoft Download Center. To install Power Map Excel add-in, you require Microsoft Office 2013 Professional Plus, Office 365 ProPlus. You can find more information on this, under Software Requirements section in the Microsoft Download Center
Once installed, you need to go to the File menu and click on Options as shown below, to enable the add-in for use:
Enable the Add-in
Click on Add-Ins tab on the left side and then from the Manage combo-box, select COM Add-Ins as shown below and the click on Go button:
Manage COM Add-ins
On the COM Add-Ins dialog box, check “Microsoft Power Map Preview for Excel” and then click on OK button:
Microsoft Power Map Preview for Excel
Now if you go to INSERT tab, you will notice the Map icon appears on the right side of the image, as seen below:
Map Icon
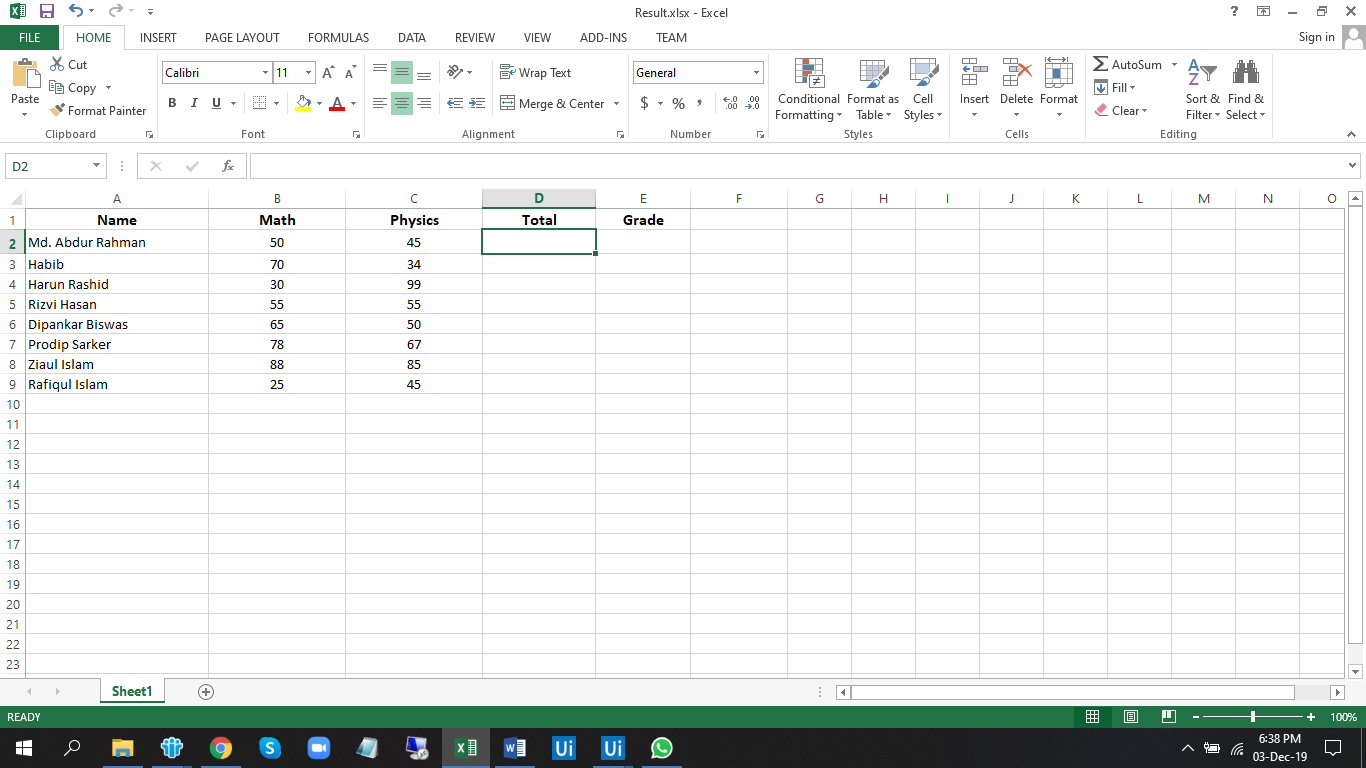
Creating a map from data
If you have some geographic information like country, state, city or longitude/ latitude, Excel can convert it to a map instantly. It uses Bing maps internally. Therefore you need an internet connection.
If you use Power View – it creates a 2D map like this (works only with Office 2013 Pro Plus). This has its own benefits. But we will focus on the 3D map capabilities of Power Map.
What does this involve? First of all, some part of data must have geographical information. This data must be converted to map locations. Now the next step is to find out what to show for each location – therefore we need some number to show. In this case we have per capita consumption of oil.
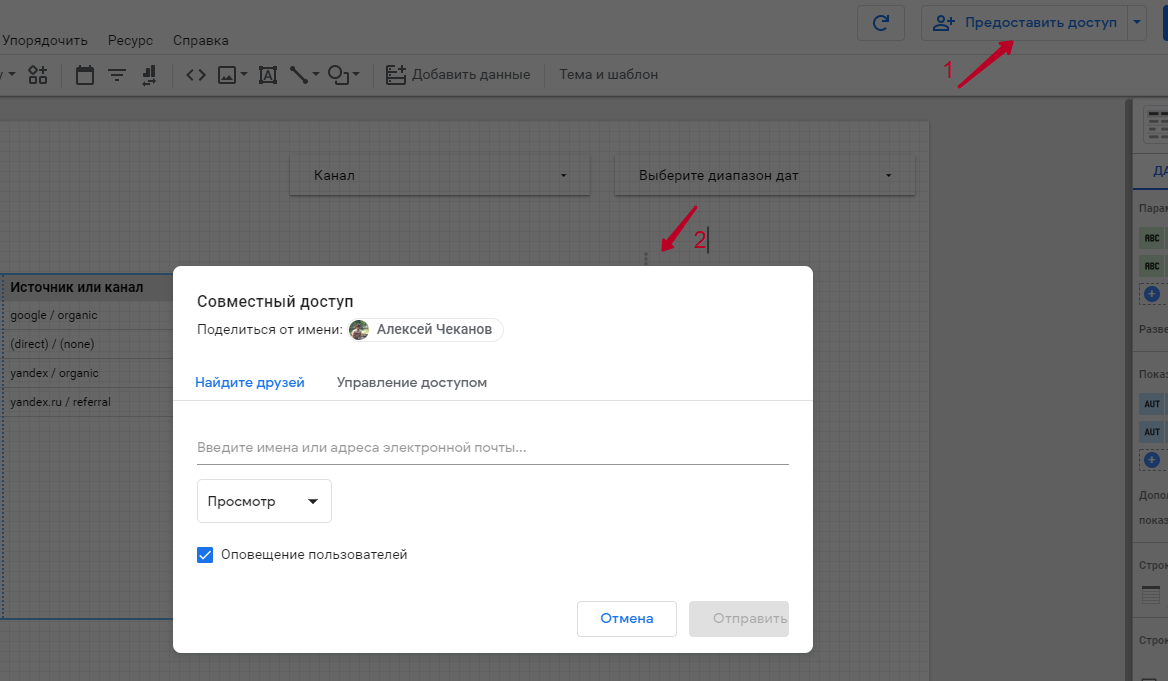
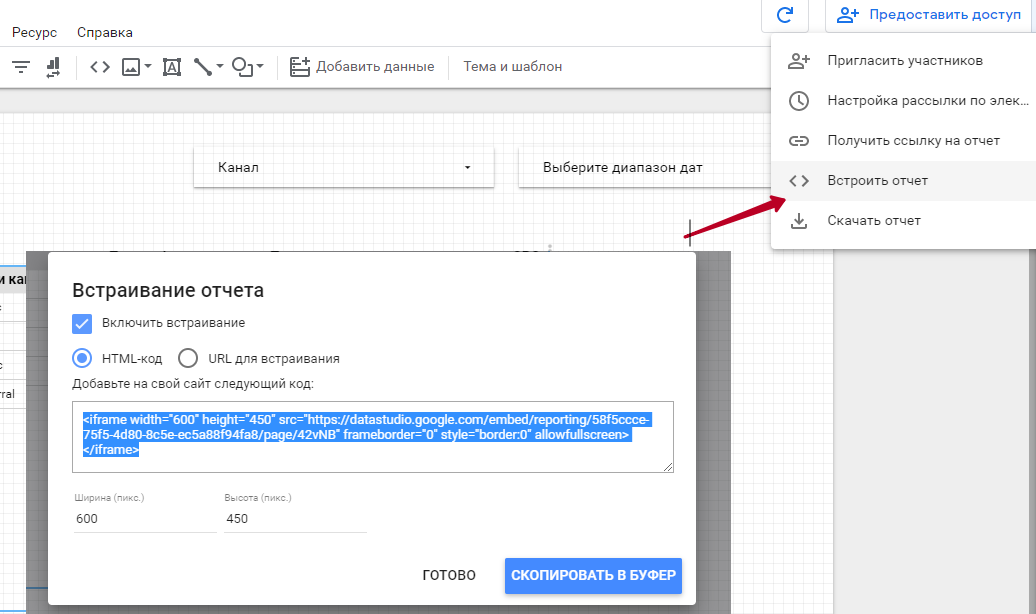
Предоставление доступов и выгрузка отчетов
Предоставить доступ другим пользователям можно с помощью такого же алгоритма, как в Google Docs и Google Таблицы:
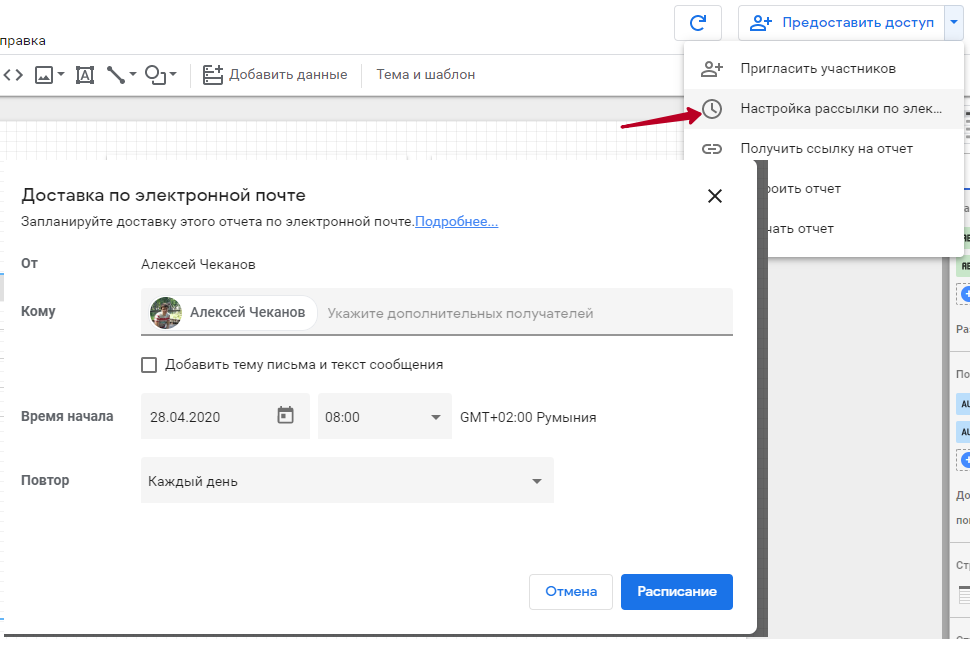
Рассылка по электронной почте
Есть возможность указать список получателей, добавить тему и текст письма, а также время рассылки с запланированным повтором: ежедневно, ежемесячно (период можно настроить и вручную).
Это удобно, если у вас несколько проектов, и их все можно поместить, например, на один лендинг.
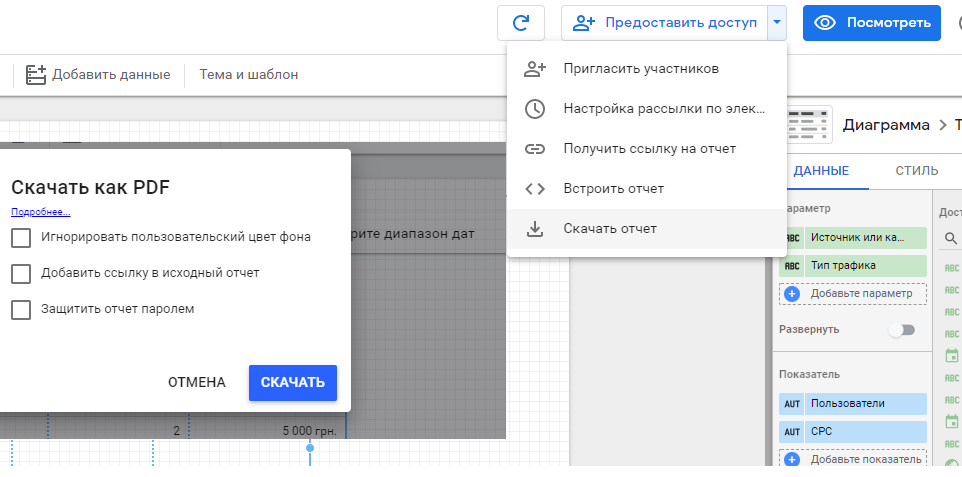
Экспорт отчета в PDF
Хороший вариант, чтобы передавать отчеты в режиме офлайн. Если у пользователя отсутствует интернет-соединение, ему можно отправить отчет в формате PDF.


Power Pivot
Power Pivot — это одна из надстроек Tool для В своем выпуске 2010 года Билл Йелен, основатель Microsoft Excel, назвал Power Pivot «лучшей новой функцией, которая случится с Excel за последние двадцать лет», поэтому вы начинаете понимать всю серьезность расширения Excel.
В Office 2016 включена Power Pivot
в базовой установке для Excel, подчеркивая его важность как анализа данных и инструмент для моделирования данных. Power Pivot может обрабатывать большие объемы данных, импортируемых из различных внешних источников, расширяя функциональность стандартной функции сводной таблицы
Используйте Power Pivot тоже:
- Импорт и управление миллионами строк данных для нескольких источников.
- Создание аналитических связей между данными из разных источников, быстрое создание и моделирование таблиц данных с использованием стандартизированных функций.
- Подача данных в другие мощные инструменты Excel: сводные диаграммы, диаграммы, сетки, режим просмотра электропитания, карта электропитания и многое другое.
- Используйте Data Analysis Expressions или DAX, новый язык формул, расширяющий возможности работы с данными в Excel. Вы можете прочитать введение в DAX здесь .
Power Pivot сам по себе является важным инструментом для Power BI. Расширенные таблицы данных и модели, которые вы можете построить с помощью Power Pivot, наряду с плавной интеграцией с Power View и Power Map, дают вам возможность выявлять скрытые тенденции, формировать представление о бизнесе и, самое главное, превращать эти замечательные необработанные данные в нечто доступное для анализа.

Погружная сила Pivot
Power Pivot впервые появилась как надстройка, но теперь включена в стандартную установку для Excel. Вы просто должны включить его.
Office 2013/2016 : откройте Excel и перейдите в Файл> Параметры> Надстройки . В поле « Управление» в нижней части экрана выберите « Надстройки COM» , а затем « Перейти» . Убедитесь, что Microsoft Office Power Pivot для Office 20xx выбран, и нажмите « ОК» . Теперь он должен появиться с вашими существующими вкладками.
Office 2010: загрузите Power Pivot для Microsoft Excel 2010 по этой ссылке . Запустите установочный пакет. После установки вкладка Power Pivot появится в Excel, и если вы перейдете в « Файл»> «Параметры»> «Надстройки», вы должны указать PowerPivot для Excel в качестве надстройки COM.
Может ли Power View распознавать города?
Power View отлично справляется с распознаванием городов. Проверим это на примере вот такой таблицы Excel:
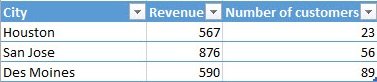
Мы хотим показать на карте доход по каждому городу.
Создайте отчёт точно так же, как это было описано выше в . Теперь это сделать проще, поскольку уже не нужно что-то включать или устанавливать.
Создаём новый лист Power View и кликаем иконку Карта (Map):
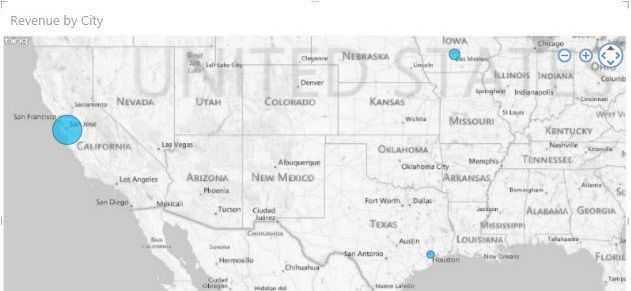
Как видно на карте, Power View отметил кругами города Houston, San Jose и Des Moines.
Иногда в разных странах встречаются города с одинаковым названием. Например, город Санта-Крус есть в США, Чили, Испании и в Боливии. В таком случае может потребоваться указать дополнительную информацию, чтобы выбрать нужный город.